Stir Fried Green Beans (炒豆角 – chǎo dòu jiǎo)

IMG_9304Another staple on every dinner table or restaurant table alike! It is usual when ordering at restaurants to have a few vegetable accompaniments after ordering all the meaty mains and I always pick this one! It’s becoming less popular at banquets as it is seen as a rather cheap and simple dish but that’s all the better! Like many ‘vegetable’ dishes in China nowadays, it has quite a bit of meat. This seems like a trend on the up as peoples craving for meat is increasingly satisfied and surpassed into pure indulgence.

This puts my recent recipe for everyday mince to good use. It looks and smells absolutely delicious and of course that’s all a prelude to how fantastic it tastes! I can eat this all day and it’s so simple to make! Warning, if you add the garlic people may avoid you, but it’s so worth it!IMG_9289

Ingredients

200 g green beans (fine beans) trimmed
1 fresh finger chilli (optional for Sichuanese style)
150 g everyday cooking mince
3 tablespoon all purpose Kikkoman gf soy sauce (or light soy sauce)
5 tablespoon Sanchi gf soy sauce (dark soy sauce)
3 tablespoon groundnut oil or vegetable oil
2 large cloves of garlic, finely chopped as garnish

Utensils

1 medium flat pan

Methods  

  1. Trim both ends of the green beans.IMG_9292
  2. Add to the pan the everyday cooking mince on medium heat for 2 minutes until sizzling.IMG_9295
  3. Throw in the green beans and stir occasionally to make sure they cook evenly. Leave them on a medium heat for 6/7 minutes (depending on personal preference, but I love to leave the beans just a little crunchy… so good!).IMG_9297
  4. In the meantime finely chop the garlic.
  5. Serve the green beans and throw on the garlic.
  6. Enjoy!

Stir Fried Eggs Tomato (西红柿炒鸡蛋 – xī hóng shì chǎo jī dàn)

IMG_9319This is a classic of chinese home cooking. I still recall being absolutely in love with this as a child, I mean literal addition. I just ate it with noodles whenever I can and occasionally I’ll change it up and have it with rice. Since then I have found many more delicious things I love but this dish remains my first, that I can recall anyway.

Although mostly eaten at home, most restaurants will serve up some version of this too if you ask for it. However in restaurants, this dish is considered and often called a sauce, xī hóng shì jiàng (tomato sauce which incidentally is the same name for ketchup so b careful), and is usually served to be eaten with rice and/or noodles. I should mention it is very different banqueting in China to how we eat chinese food in the west were, at least I, order rice along with my main dishes and eat them together. In China however, the rice and noodles are only ordered after the main dishes are served. Often when I eat out in China, rice and noodles are never ordered as everyone is usually too full by this point. Soup is usually ordered (and left) to finish the evening.

I love this dish in the summer, somehow it always feels so fresh. I also have some fresh jubilee tomatoes which works wonderfully with this dish, as they are so juicy and sweet! You can use tinned tomatoes here but fresh ingredients really makes a difference in this case.IMG_9254

Ingredients

5 tomatoes (use juicy tomatoes for extra sauce)
3 spring onions, green part only finely chopped
1 thumb-sized ginger, finely chopped
3 large cloves of garlic, finely chopped
1 fresh finger chilli (optional)
2 medium eggs
2 tablespoon groundnut oil or vegetable oil
2 tablespoon all purpose Kikkoman gf soy sauce (or light soy sauce)
3 tablespoon Sanchi gf soy sauce (dark soy sauce)

Utensils

1 small/medium wok

Methods  

  1. Finely chop the garlic and ginger and roughly cut the spring onion into 3 cm chunks.IMG_9255
  2. Place the wok and oil on a medium heat, then add the spring onion, ginger and garlic. Stir fry until the spring onion softens. IMG_9266
  3. In the meantime chop the tomatoes into 2 cm chunks.IMG_9260
  4. Move everything up to one side of the wok and crack in 2 eggs.IMG_9269
  5. Stir and scramble the eggs until cooked, then mix everything in the wok together.IMG_9271
  6. Add the soy sauce and chillies then cook for 2 minutes.IMG_9276
  7. Throw in the tomatoes and cook to a boil. Then reduce the heat to low and cook slowly for another 10 minutes.IMG_9282
  8. Serve and enjoy!

Everyday Cooking Mince

IMG_9244This is a good all purpose cooking mince which can be used and useful in many chinese dishes. It’s easy to make and gives instant flavour to any dish, plus it is delicious to eat just on its own (guilty), if you so choose.

I will often use this if I want to cook something quickly and it’s usually powerful enough to still give that depth of flavour. IMG_9221

Ingredients

400 g pork mince (for best results use mince with 10% fat or more)
4 spring onions, green part only finely chopped
1 thumb-sized ginger, finely chopped
3 large cloves of garlic, finely chopped
3 tablespoon groundnut oil or vegetable oil
3 tablespoon all purpose Kikkoman gf soy sauce (or light soy sauce)
5 tablespoon Sanchi gf soy sauce (dark soy sauce)

Utensils

1 medium non stick pan

Methods  

  1. Prepare the spring onion, ginger and garlic.IMG_9229
  2. Heat the oil in the pan until hot, then add the garlic and pork mince.Cook for 5 minutes on a medium heat until the mince has browned.IMG_9235
  3. Add the ginger and spring onion and cook for a further 2 minutes.IMG_9237
  4. Finally pour in the dark and light soy sauce and cook until the sauce is reduced by half. Stir continuously.IMG_9239
  5. When ready, place in a bowl or lunch box to be kept in the fridge for when necessary.

Cumin Beef (孜然牛肉 – zi ran niu rou)

IMG_9215The use of cumin with beef and lamb originates from the Muslim populated regions of North-West China. It has been popularised through street vendors selling grilled meat skewers covered with cumin and chilli powder. Almost everywhere you go in China now, where there are street food, there will be the smell of cumin and lamb drifting through the air. It makes my mouth water just thinking about it!

This particular dish has been adopted and transformed by Sichuanese and Hunanese cooking style, and what emerges is something blindingly hot but utterly delicious! It perfectly captures the signature aroma and taste of those Uyghur street vendor grilled kebabs but with an extra kick. You have been warned!

IMG_9167

Ingredients

400 g beef fillet steak (rump or braising steak are also fine)
3 spring onions, green part only finely chopped
1 thumb-sized ginger, finely chopped
2 large cloves of garlic, finely chopped
3 medium fresh stir fry chilli
2½ teaspoon cumin
3 teaspoon dried chilli flakes (this is hot, add or reduce to taste)
1 teaspoon sesame oil (optional)
400 ml groundnut oil or vegetable oil
salt

For the marinade

1 tablespoon cornflour
1 salt
1 tablespoon all purpose Kikkoman gf soy sauce (or light soy sauce)
1 tablespoon Sanchi gf soy sauce (dark soy sauce)
1 tablespoon rice wine vinegar (Shaoxing Wine if you’re not coeliac)
1 tablespoon water

Utensils

1 medium non stick pan
1 large bowl
1 jug

Methods  

  1. Finely chop the spring onion, ginger and garlic and set aside. Remove the stalk and seeds from the fresh chillies, then finely chop.
  2. Cut the beef into thin slices (4 x 3 cm) or strips (4 x 1.5 cm) across the grain to give the meat a more tender texture. I’m using fillet steak but other cuts are fine too, it actually doesn’t matter too much.IMG_9180
  3. Add the marinade mixture to the steak in a large bowl, and mix well.IMG_9189
  4. Heat the groundnut oil on a high heat until hot, then add the beef and stir. Remove once the pieces separate, drain and set aside.IMG_9195
  5. Pour away all but 3 tablespoons of groundnut oil and return to a high heat. Add the ginger, garlic fresh chillies, chilli flakes and cumin then stir briefly. You should get an amazing aroma at this point.IMG_9198
  6. Add the beef into the pan and salt to taste.IMG_9204
  7. Sizzle for 1 minute, stir occasionally. Then add the spring onion and mix in well before removing from the heat.IMG_9205
  8. Mix in sesame oil and serve!
  9. Enjoy!

Red Roasted Pork ( 红烧肉 – Hong Shao Rou)

IMG_9163It’s Monday and the weather is miserable outside, just another day in the UK some might say. So I’ve selected this deliciously warm and cosy dish which makes it just a little more bearable.

I also want to take the opportunity to clear up any misconceptions surrounding this dish. Most people probably have never heard of it before, but recently I was watching my favourite pass time show – come dine with me (that’s cdwm to fans out there), and one contestant made this dish. Initial excitement was soon followed by despair. She claims to have first come across this dish whilst living in Dubai at her favourite Thai restaurant (what, right?) and got her recipe from there… So far still ok, but then one of her first ingredients was red food dye to colour the meat… oh spare me.

Whilst the colour (red or hong) is essential, it’s in the name, it comes from the way the meat is cooked and not artificially added. Another common misconception is mixing this dish up with Char Siu (literally means fork burn/roast) which is a cantonese dish and is also red on the outside (this colour does often come from food colouring).

Although not as iconic as Kung Pao chicken (certainly outside of mainland China) it is still a very symbolic. To me it represents an era of China before the modern day industrialisation machine really took hold. Perhaps it’s the colour (red) or because it was supposedly one of Mao Zedong’s favourite dishes but I always associate it with the period around the revolution when food was scarce and meat was rare. When people preferentially picked meat which had more fat as it gave the meat more taste and you more energy (I still remember first being in the UK and finding it astonishing how lean all the meat in the chilled isles were). This dish is typically made with streaky belly pork, known in China as ‘wu hua rou’ which literally translates to ‘five flower’ meat because of the 5/6 layers of fat and lean.

This might be the reason why its popularity has fallen in recent years as people in China becomes more health conscious. But I still think on occasions this dish can be a fantastically sensational treat and there can be no arguing with how it tastes… delicious! I’d usually eat this with a couple of other vegetable dishes with rice.IMG_9104

Ingredients

500 g streaky pork belly (with skin optional)
3 spring onions, finely chopped
30 g thumb-sized ginger, finely chopped
1 tablespoon white sugar
3 tablespoons groundnut oil or vegetable oil
3 tablespoons all purpose Kikkoman gf soy sauce (or light soy sauce)
3 tablespoons Sanchi gf soy sauce (dark soy sauce)
2 tablespoons rice wine vinegar (Shaoxing Wine if you’re not coeliac)
½ a star anise
500 ml chicken stock

Utensils

1 medium non stick pan with lid
1 medium pot
1 sieve

Methods  

  1. Cut the pork into 3 ± 0.5 cm chunks, try to ensure each piece has a good mixture of fat and lean meat, and blanch in boiling water for 2 minutes.IMG_9117
  2. Drain the meat and set aside.IMG_9133
  3. Add the oil and sugar to the pan over a low heat until the sugar has dissolved. Add the pork and turn the heat up to medium and cook for 2 minutes until lightly browned.IMG_9143
  4. Add the stock and all the other ingredients, then stir well.IMG_9151
  5. Bring the whole thing to boil, then simmer with the lid slightly uncovered over a very low flame for about 1 hour 40 minutes. Stir occasionally to avoid burning, until the liquid is significantly reduced to a glistening coating.IMG_9155
  6. Serve, eat and enjoy!

Kung Pao chicken (宫保鸡丁 – gong bao ji ding)

IMG_9092

I have selected this somewhat iconic dish for my first blog post as I often find it’s international popularity is only rivaled by its lack of authenticity. It is also somewhat controversial as many people (mainly chinese, in particular those who grew up or have visited china and eat away from the touristy restaurants) see this dish as a western obsession which often distracts them from the vast array of other dishes and styles of food China has to offer.

However, Kung Pao chicken (correctly pronounce ‘Gōng bǎo‘ chicken) is fundamentally a classic chinese dish from the Sichuan (Szechuan) region, although you can find it in most restaurants around Chine even if its not on the menu. In fact I think you might be hard pressed to find a restaurant in Beijing (you might say it’s a touristy town) or even xinjiang (how’s that for far and remote) where if you insisted, the chef couldn’t make some version of this dish for you. It’s chef school 101 in China (I imagine, or they’ve just grown up around it so much).

Anyway I’m digressing here. Sichuan cuisine or ‘chuan cai’ is a major food style in China (with 81 million people in Sichuan province that might not be surprising). It’s signature is often described as numbingly hot with plenty of chilli oil. Perhaps that’s why it’s likely the most popular food style in China, as people eat out they enjoy turning the heat up and getting a good sweat on (delicious imaginary for a food blog right?) which they might not do at home everyday. This could also be why perhaps Sichuan cuisine is on the decline as people opt for more refined/dignified dining. Also the popularisation of chilli sauces such as Lao Gan Ma has allowed people to enjoy that thrill of heat in the dignified confines of their own home. Just look how popular those sauces have become!

You might have gathered by now I’m a big fan (what’s bigger than big… huge, massive – gargantuan fan) of Sichuan cuisine, and so fortunately is my girlfriend when she’s not saving lives like right now whilst I’m sitting here writing this. That’s why I chose this iconic dish as my first recipe.

Introduction/rant over, here’s how to make a proper gong bao ji ding (there will no none of this orange nonsense so put them away) gluten free!

P.S. For a healthier version of this you can stir fry the chicken chunks and sprinkle the Sichuan peppercorn powder as you do so, instead of covering in the mix and deep frying.

IMG_9020

Ingredients

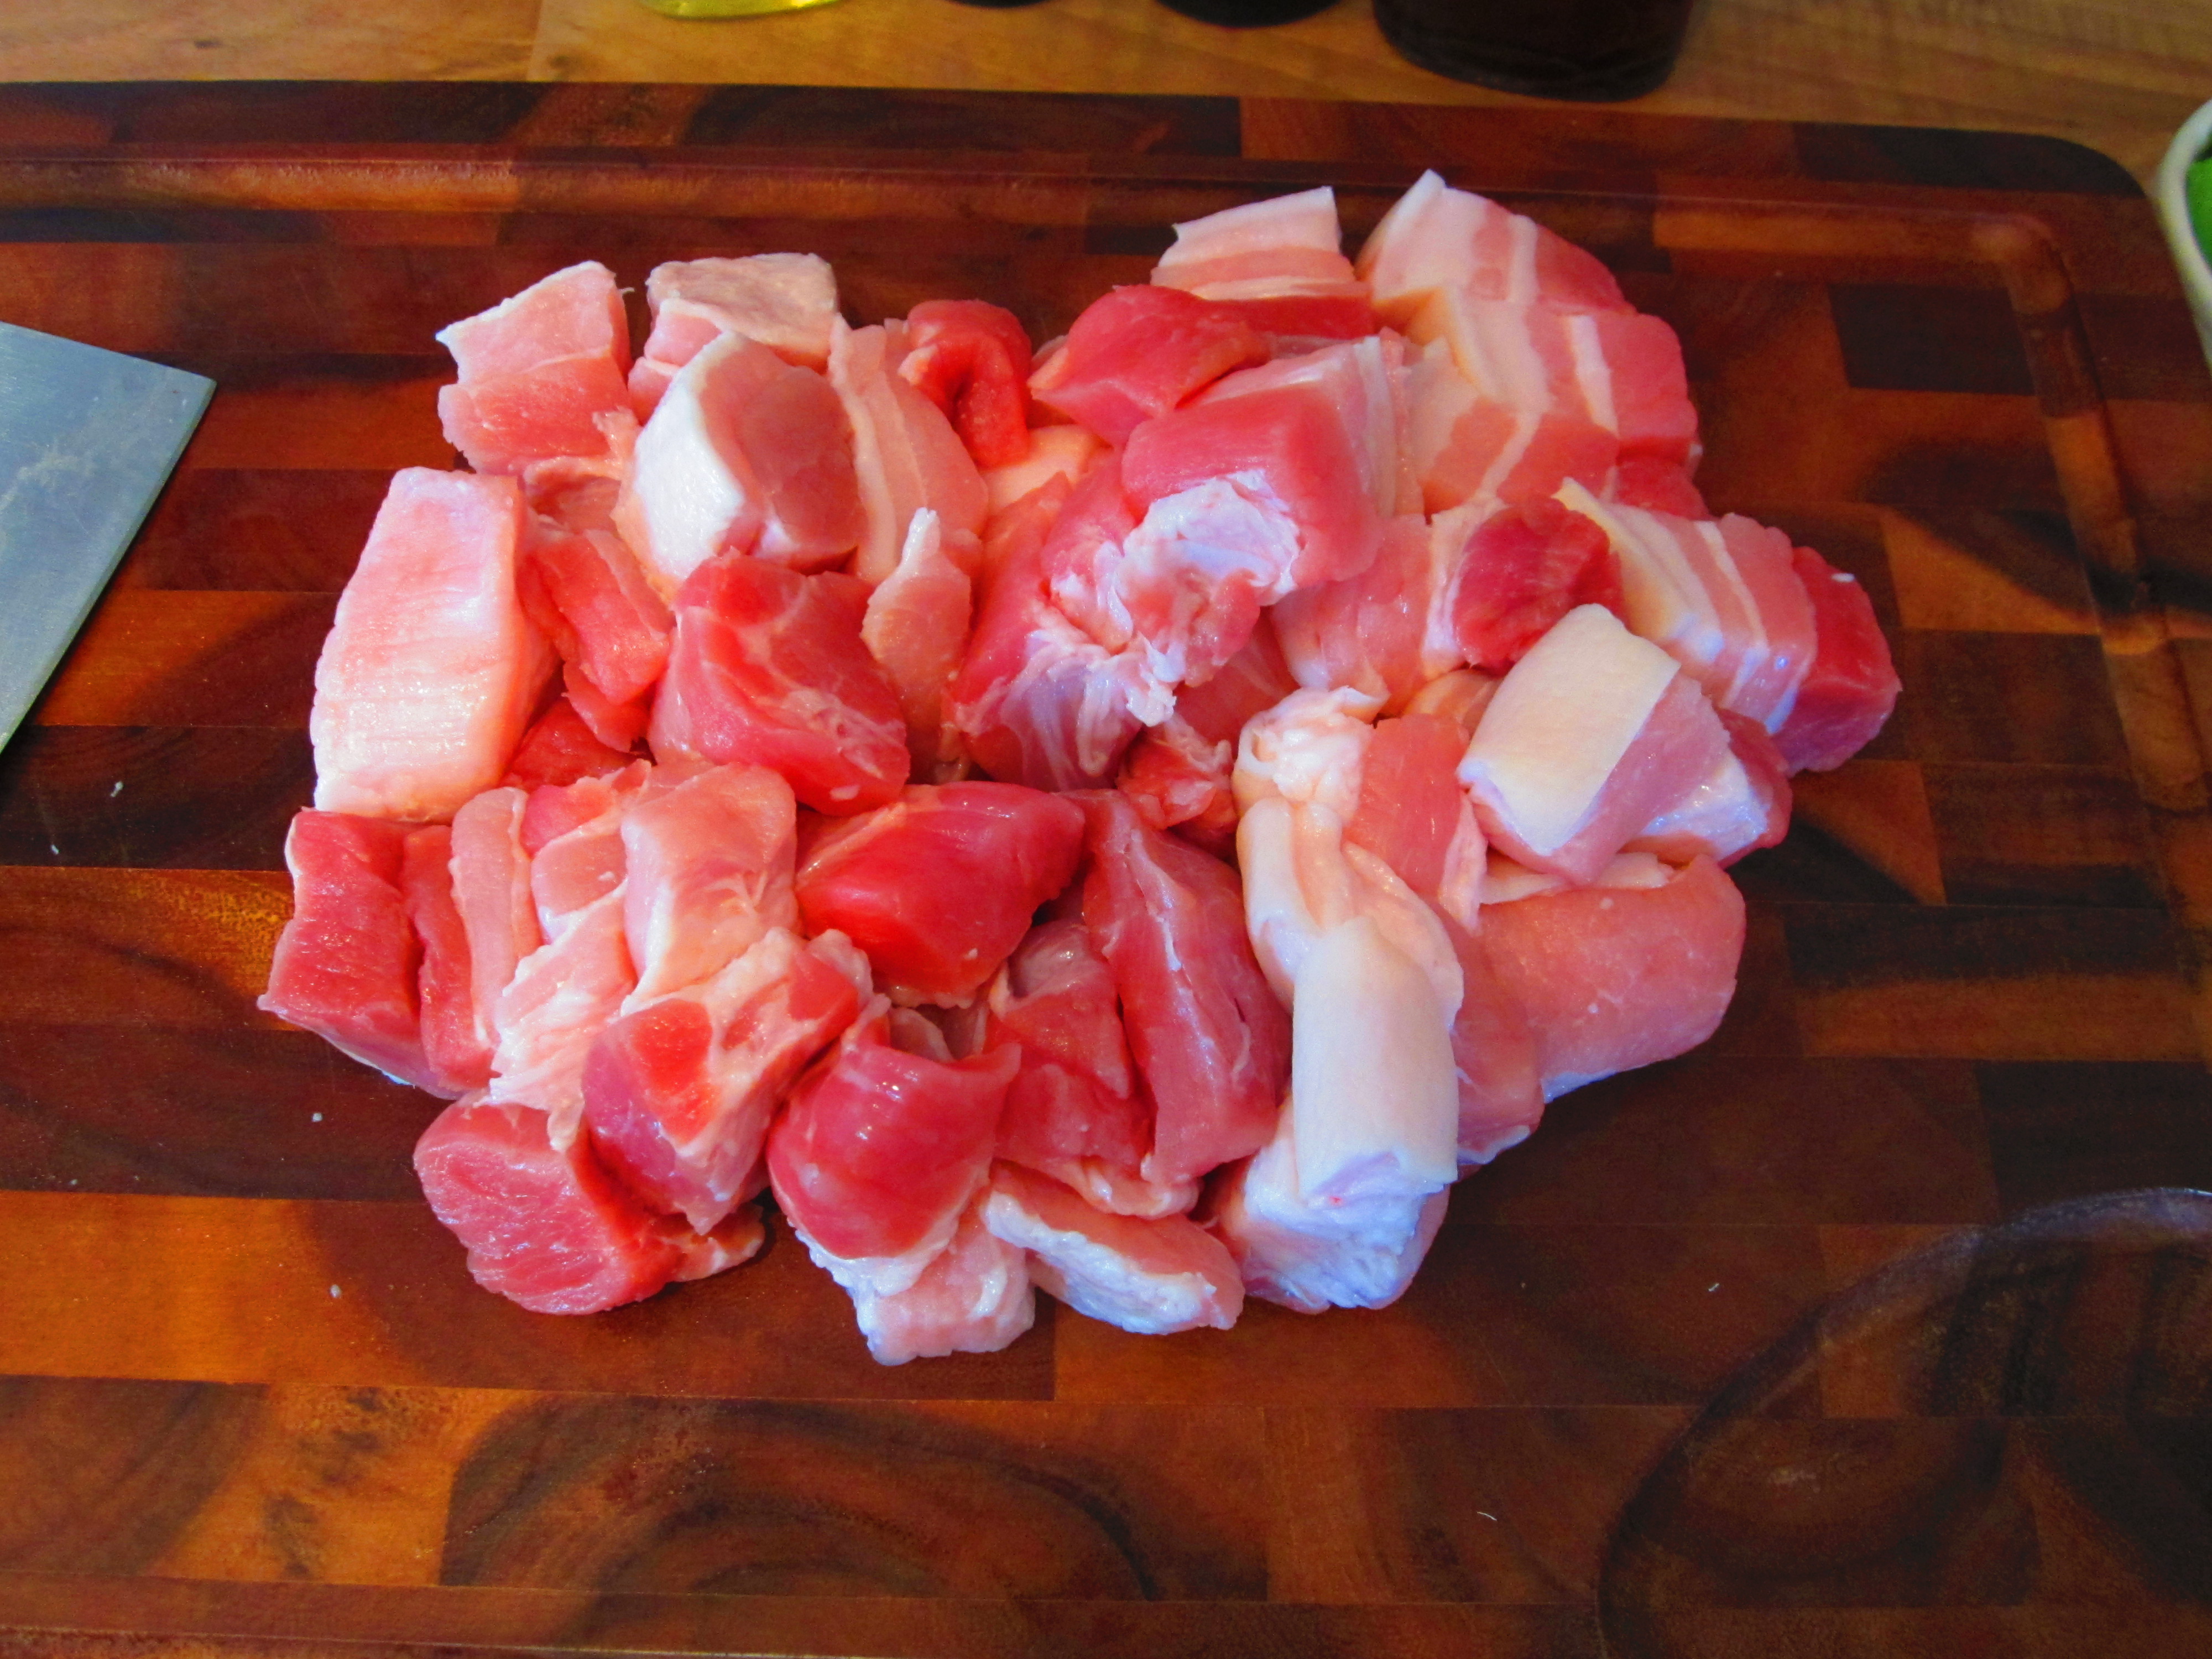
400 g chicken thighs (or fillets)
4 spring onions, finely chopped
1 thumb-sized ginger, finely chopped
3 large cloves of garlic, finely chopped
1½ tablespoons Sichuan peppercorn
6½ tablespoons cornflour
9 dried large red chillies (nothing too hot, more sweet for show)
1 large fresh stir fry chilli
60 g cashew nuts (peanuts can be a poorer alternative)
200 ml groundnut oil or vegetable oil
6 tablespoons all purpose Kikkoman gf soy sauce (or light soy sauce)
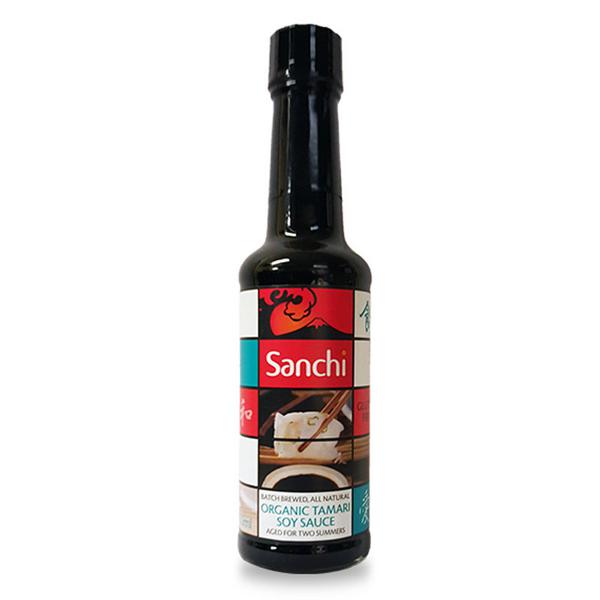
2 tablespoons Sanchi gf soy sauce (dark soy sauce)
2 tablespoons rice wine vinegar
3 heaped tablespoons runny honey

Utensils

1 medium non stick pan
1 small non stick pan
pestle and mortar
1 large bowl

Methods  

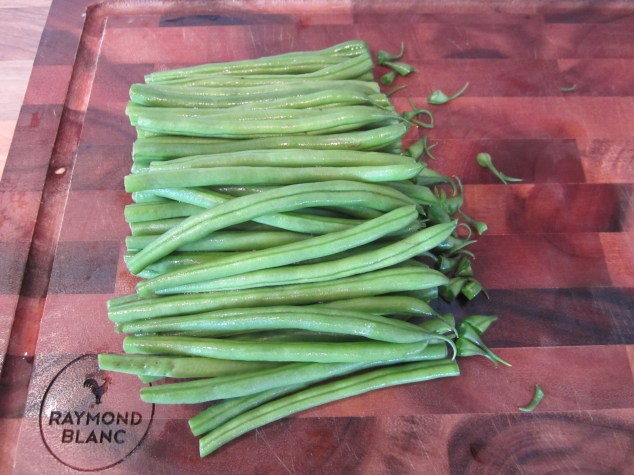
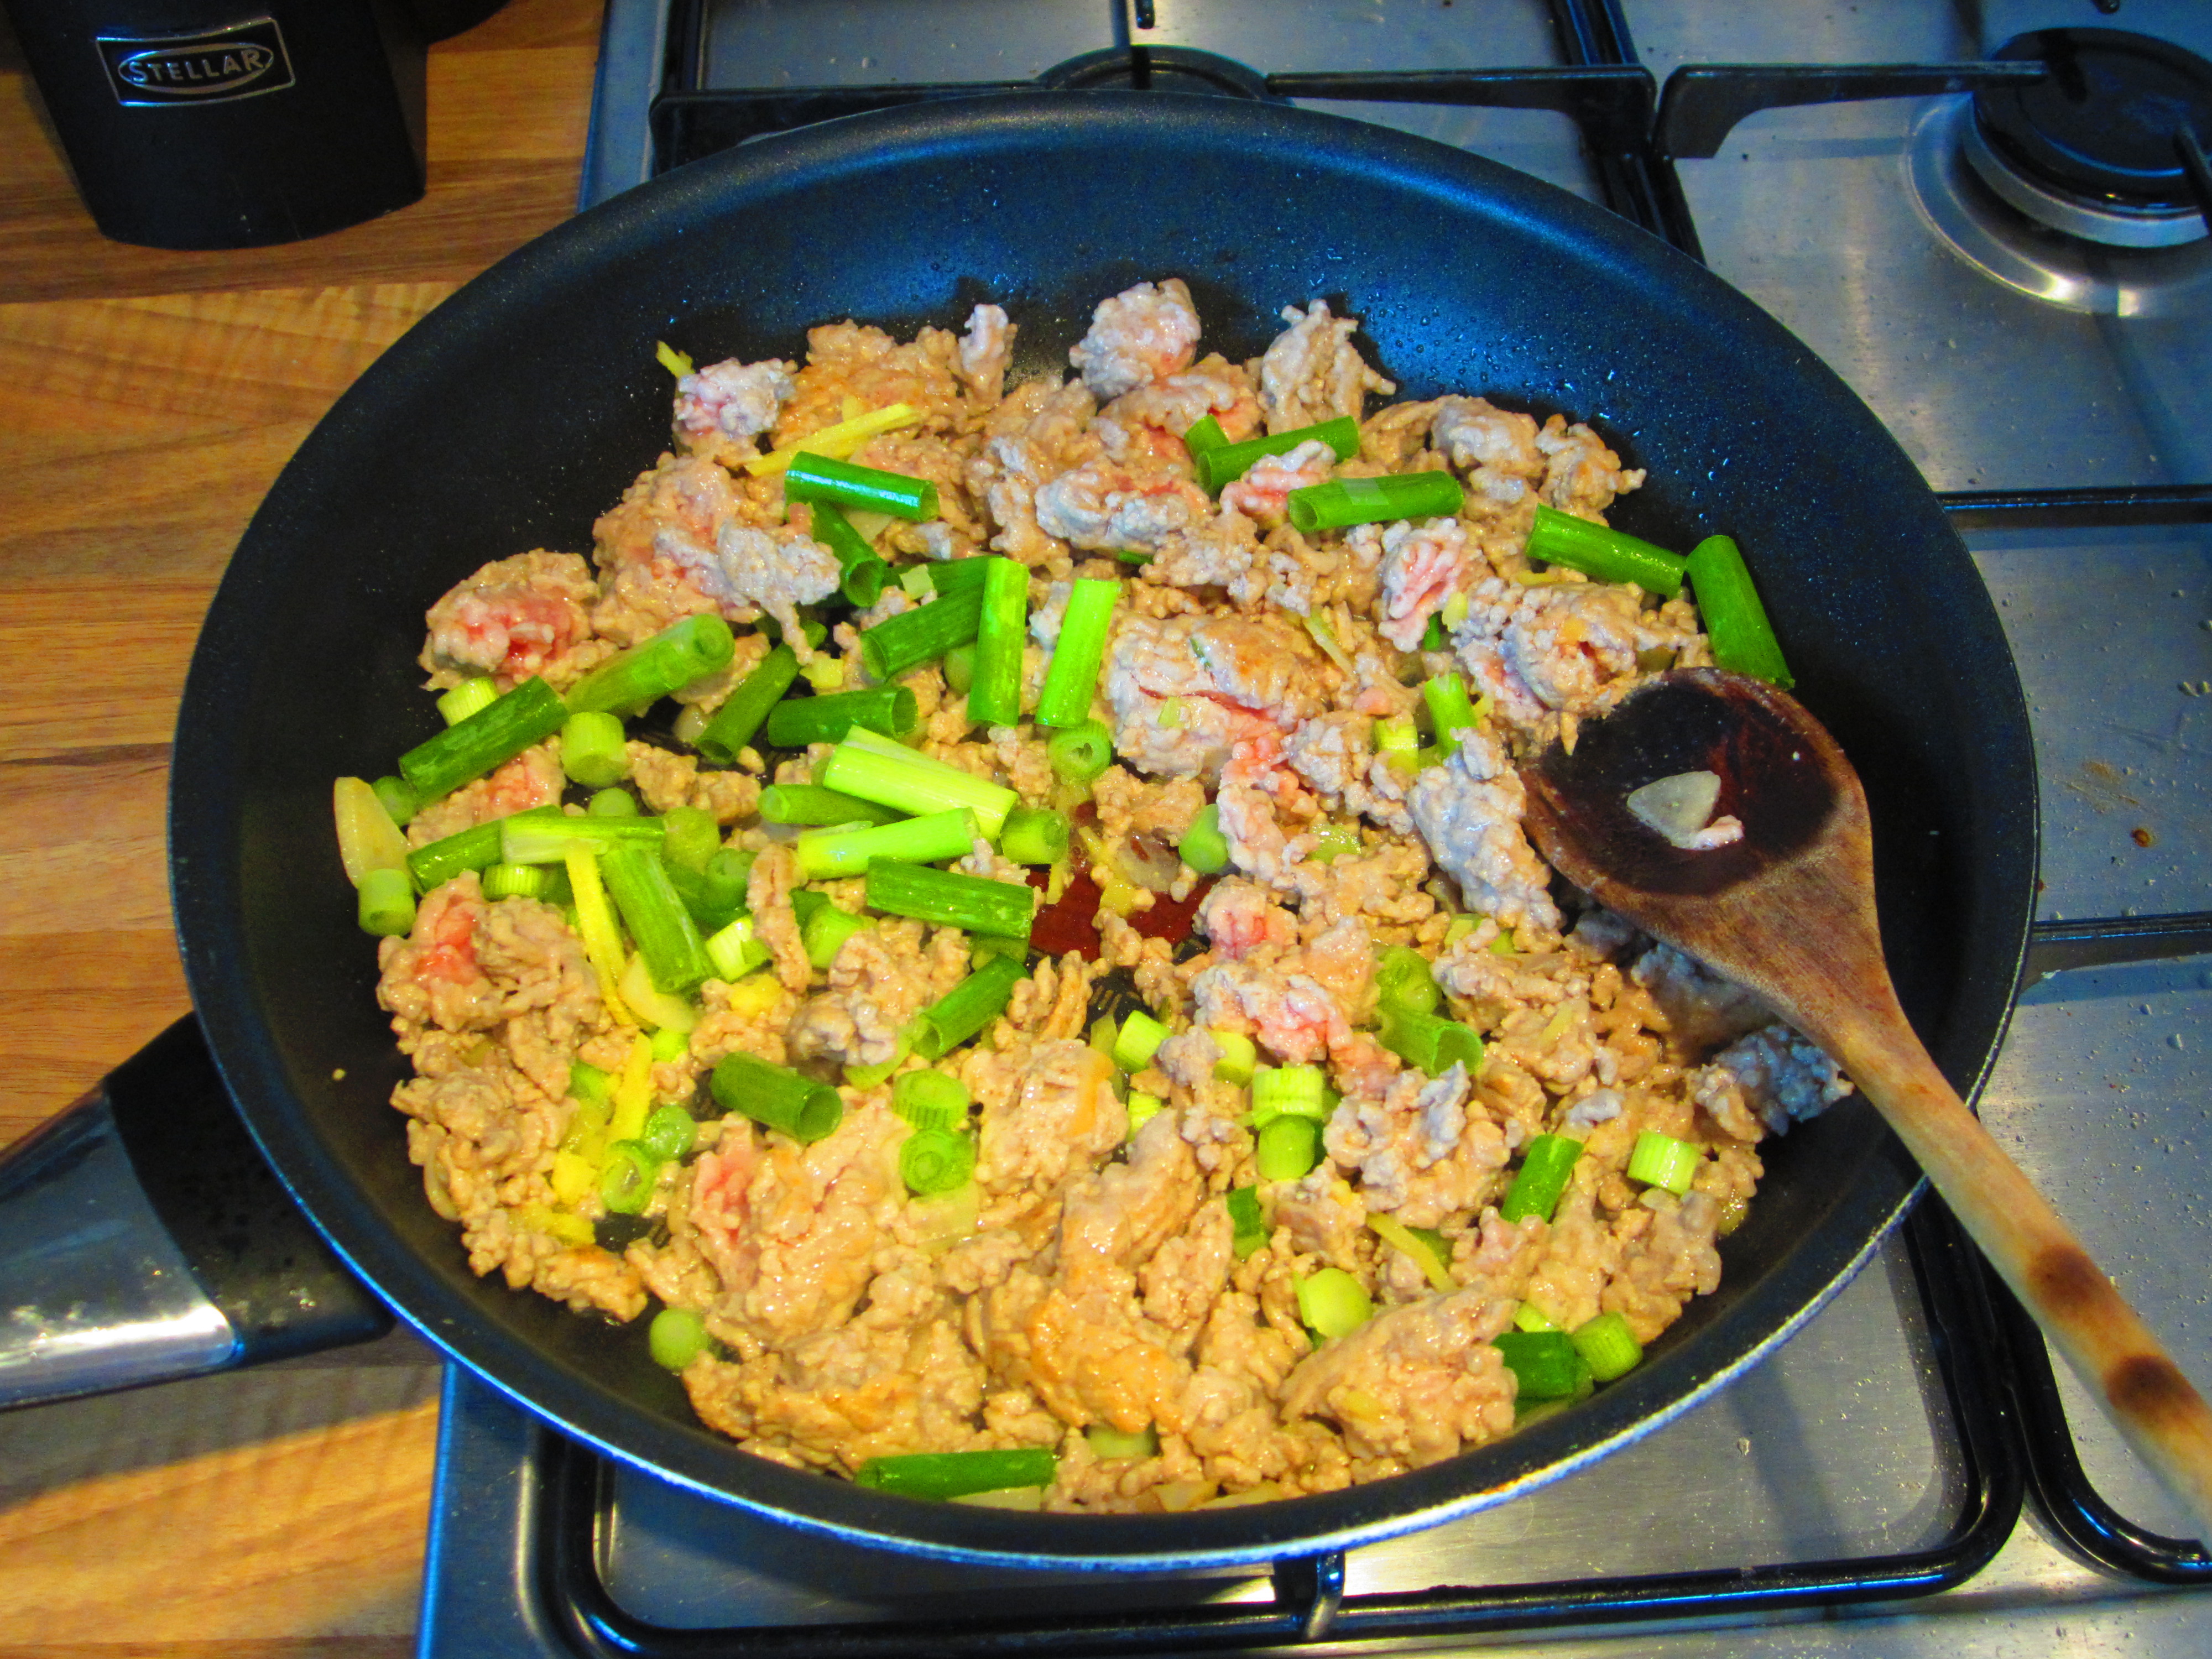
  1. Finely slice the spring onion and fresh chilli then peel and finely chop the ginger and garlic. Roughly cut the dry chillies into chunks (add more if desired, in Sichuan cuisine dry chillies are added liberally).IMG_9040
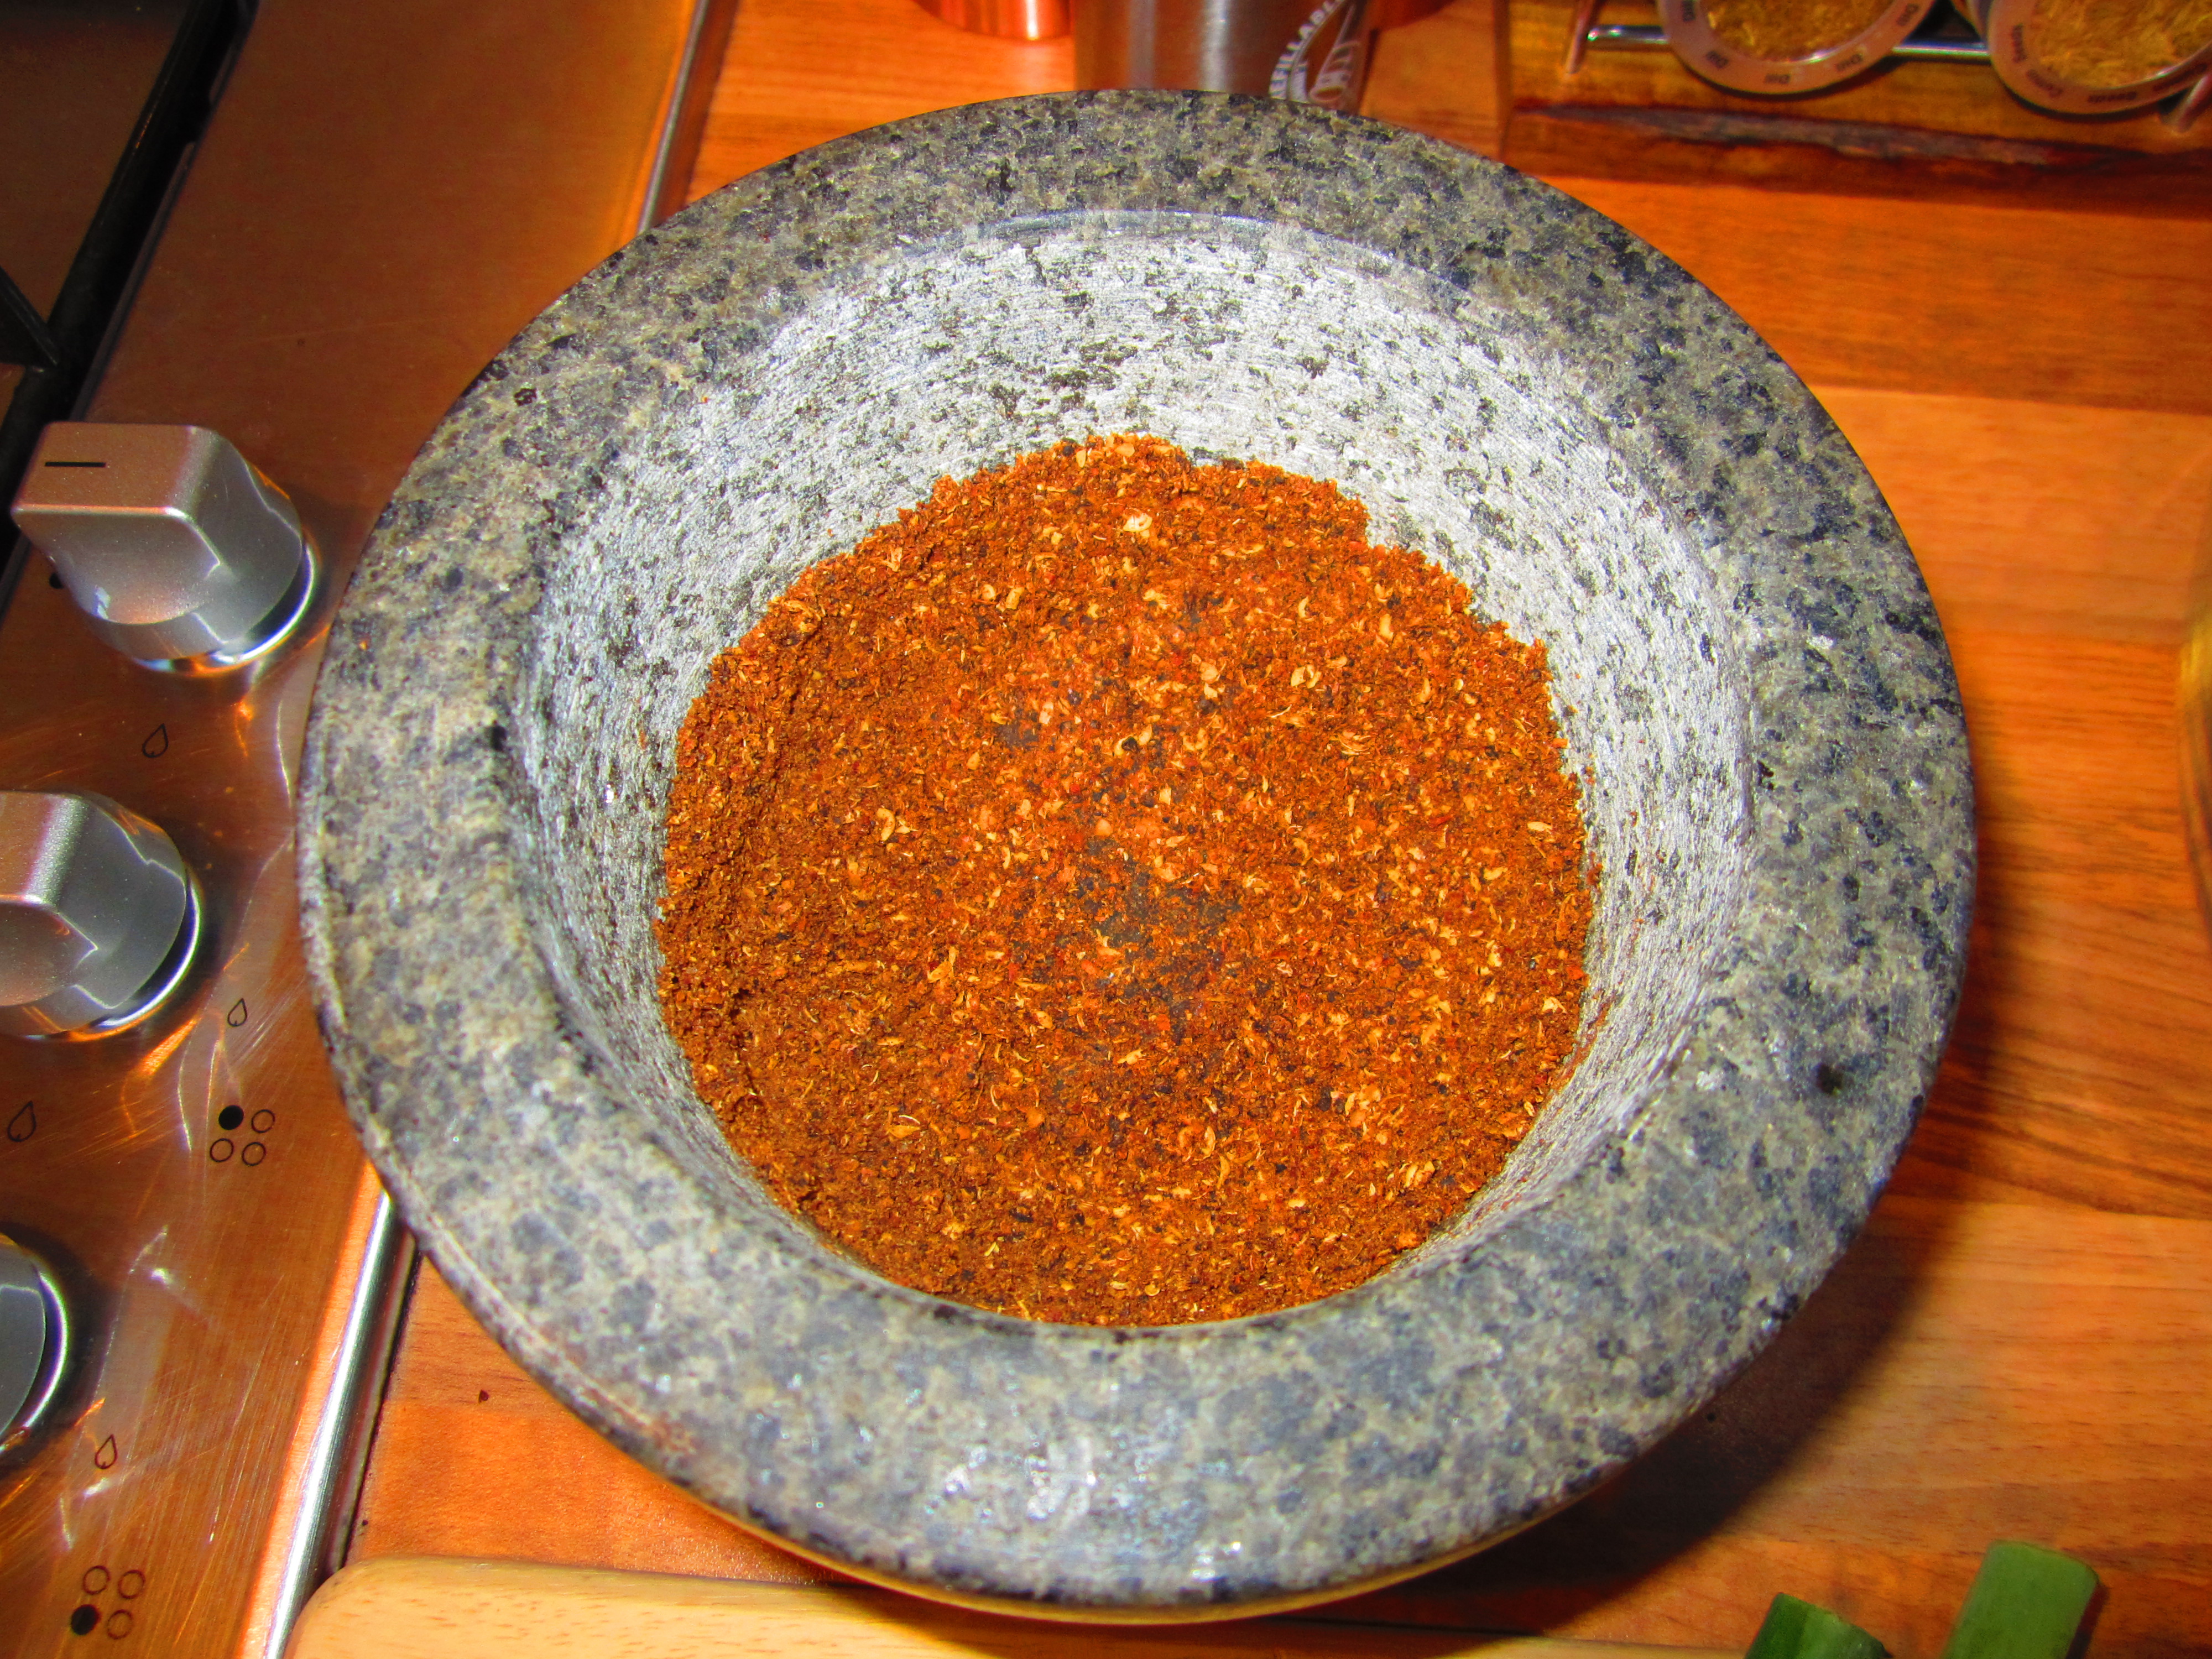
  2. Start by toasting the Sichuan peppercorn in a small frying pan, dry, until lightly golden. You should get a distinct aroma from the peppercorn. Transfer to a pestle and mortar, grind to a fine powder.IMG_9032
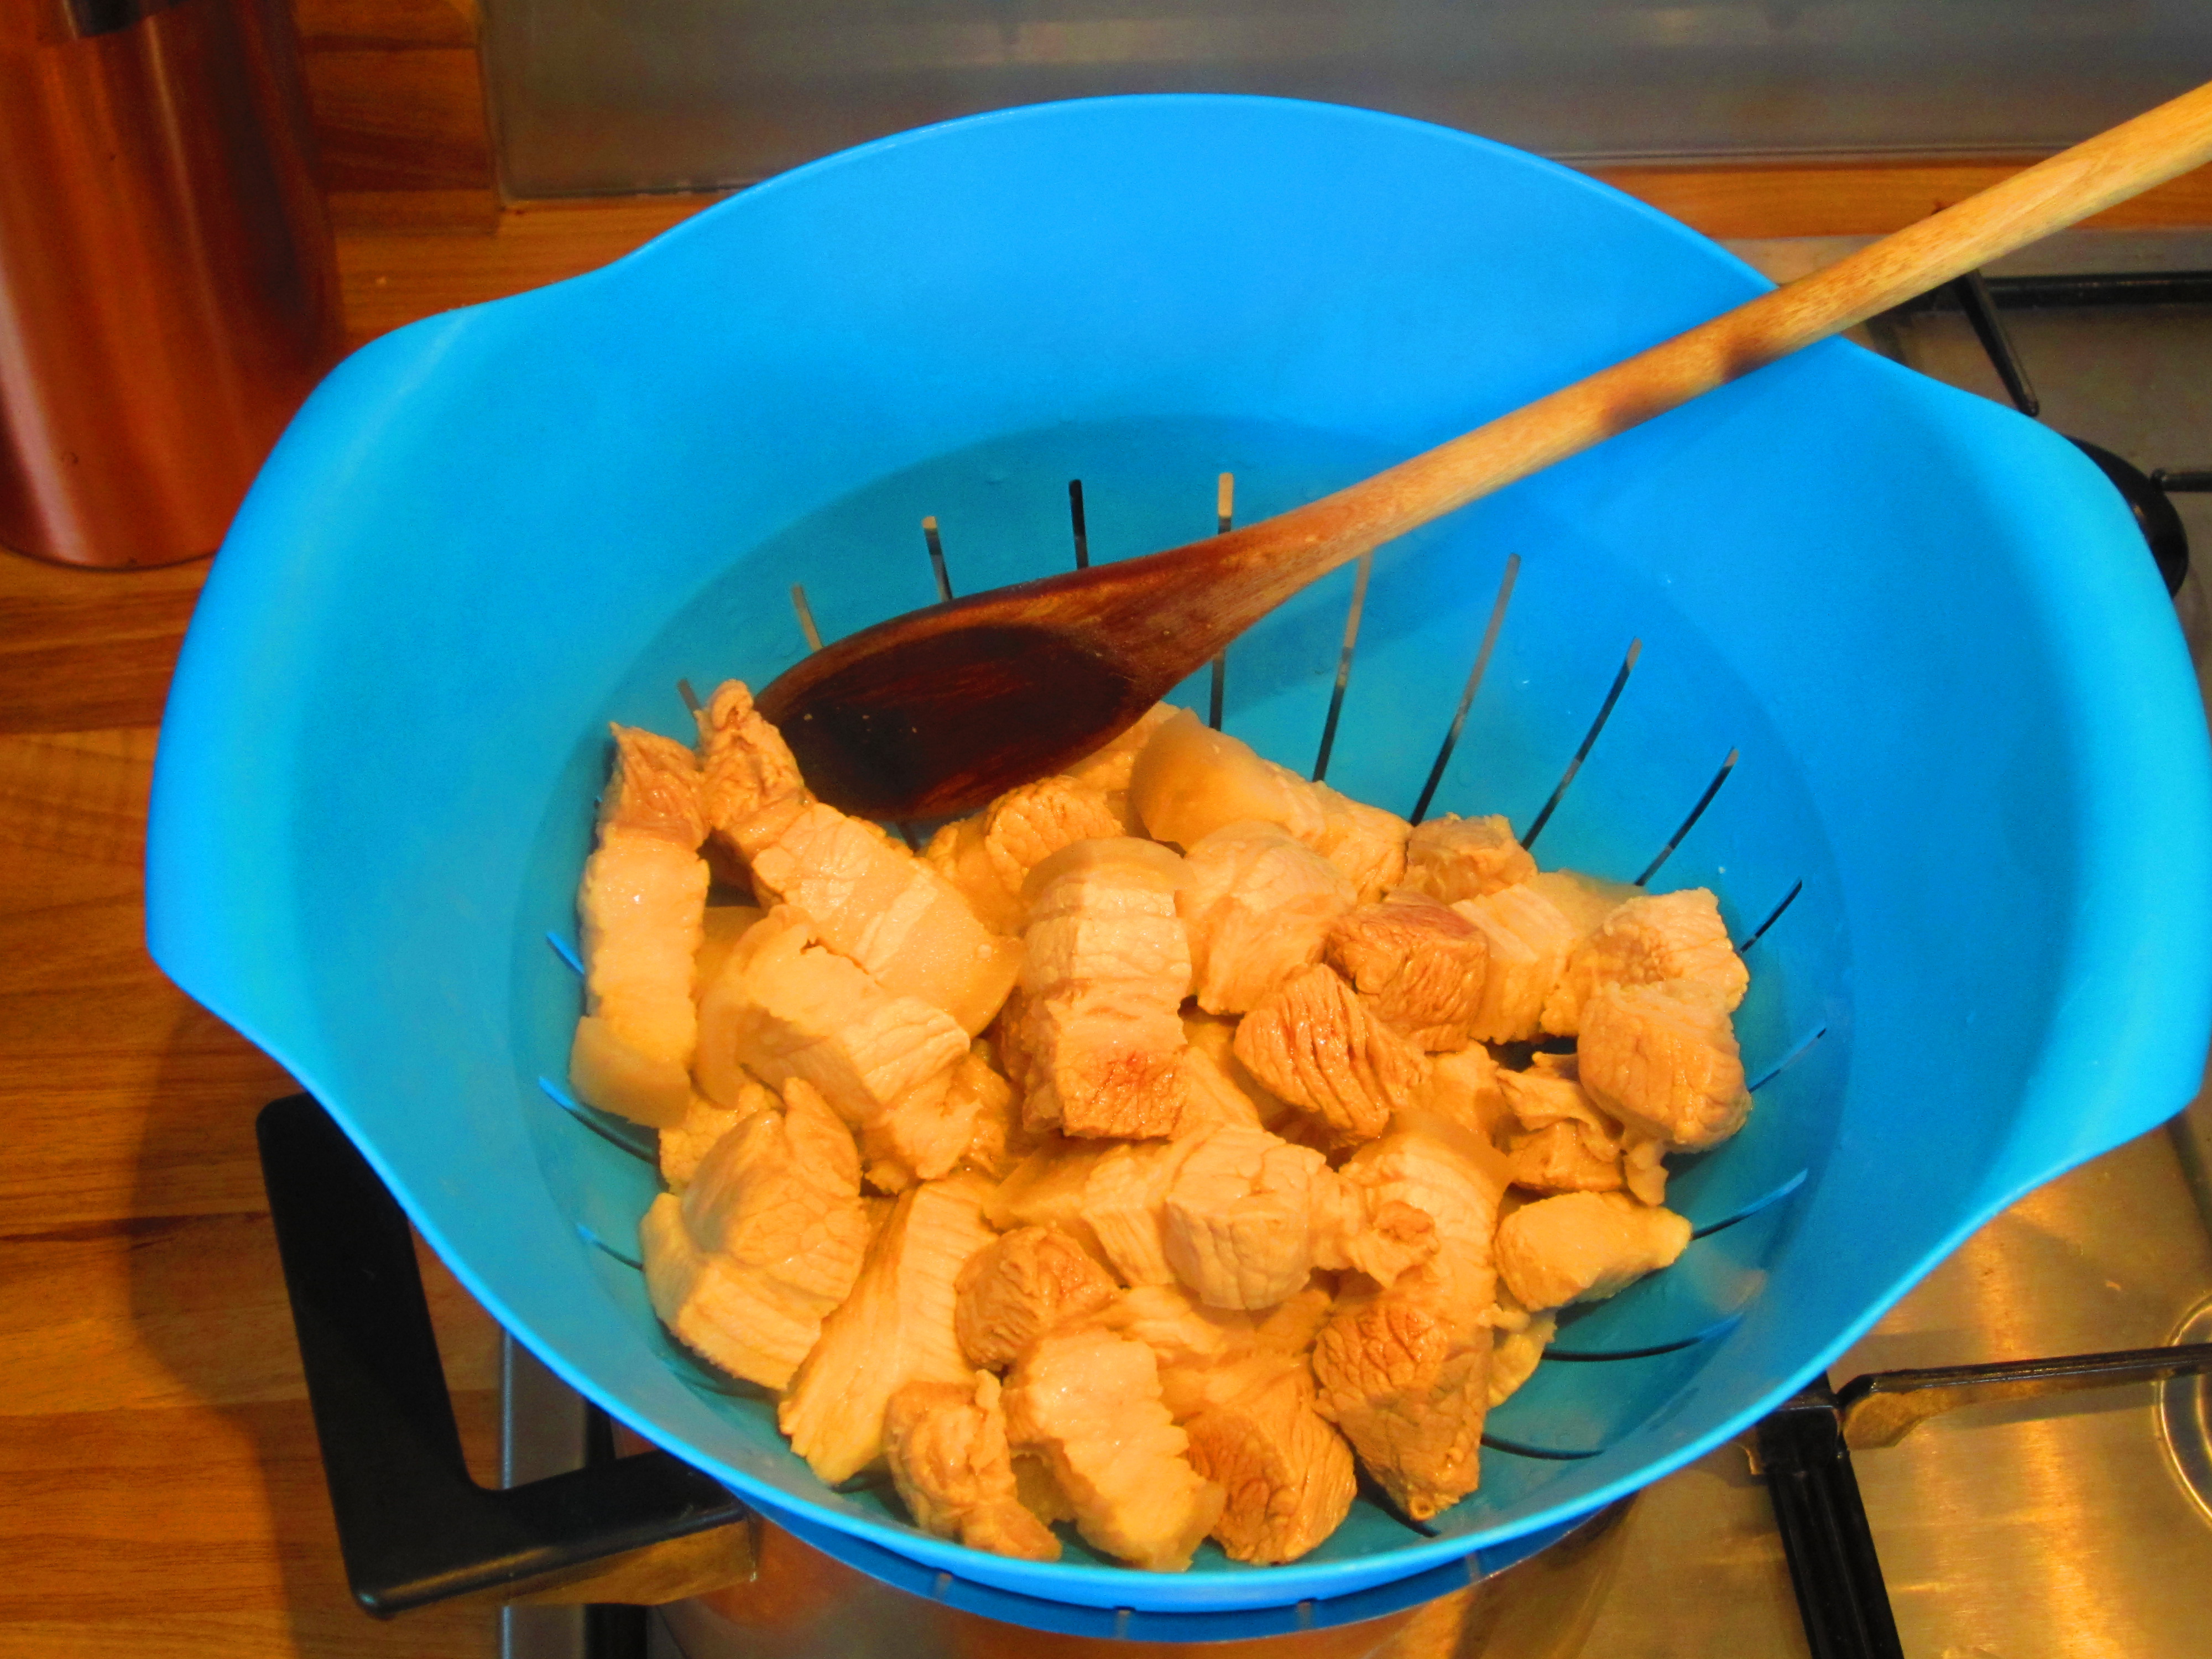
  3. Add the peppercorn powder to a large bowl and mix in 4 tablespoons of cornflour, stir together.
  4. Dice the chicken into bite-sized chunks (~2 cm cubes perhaps), then throw into the cornflour and mix it all together until the chicken is fully coated.IMG_9049
  5. Add the oil to a medium sized pan until ~2 cm of depth. Place over a medium heat then carefully add the chicken and fry for 7 minutes. Stir halfway through to ensure the meat is cooked thoroughly and evenly.IMG_9057
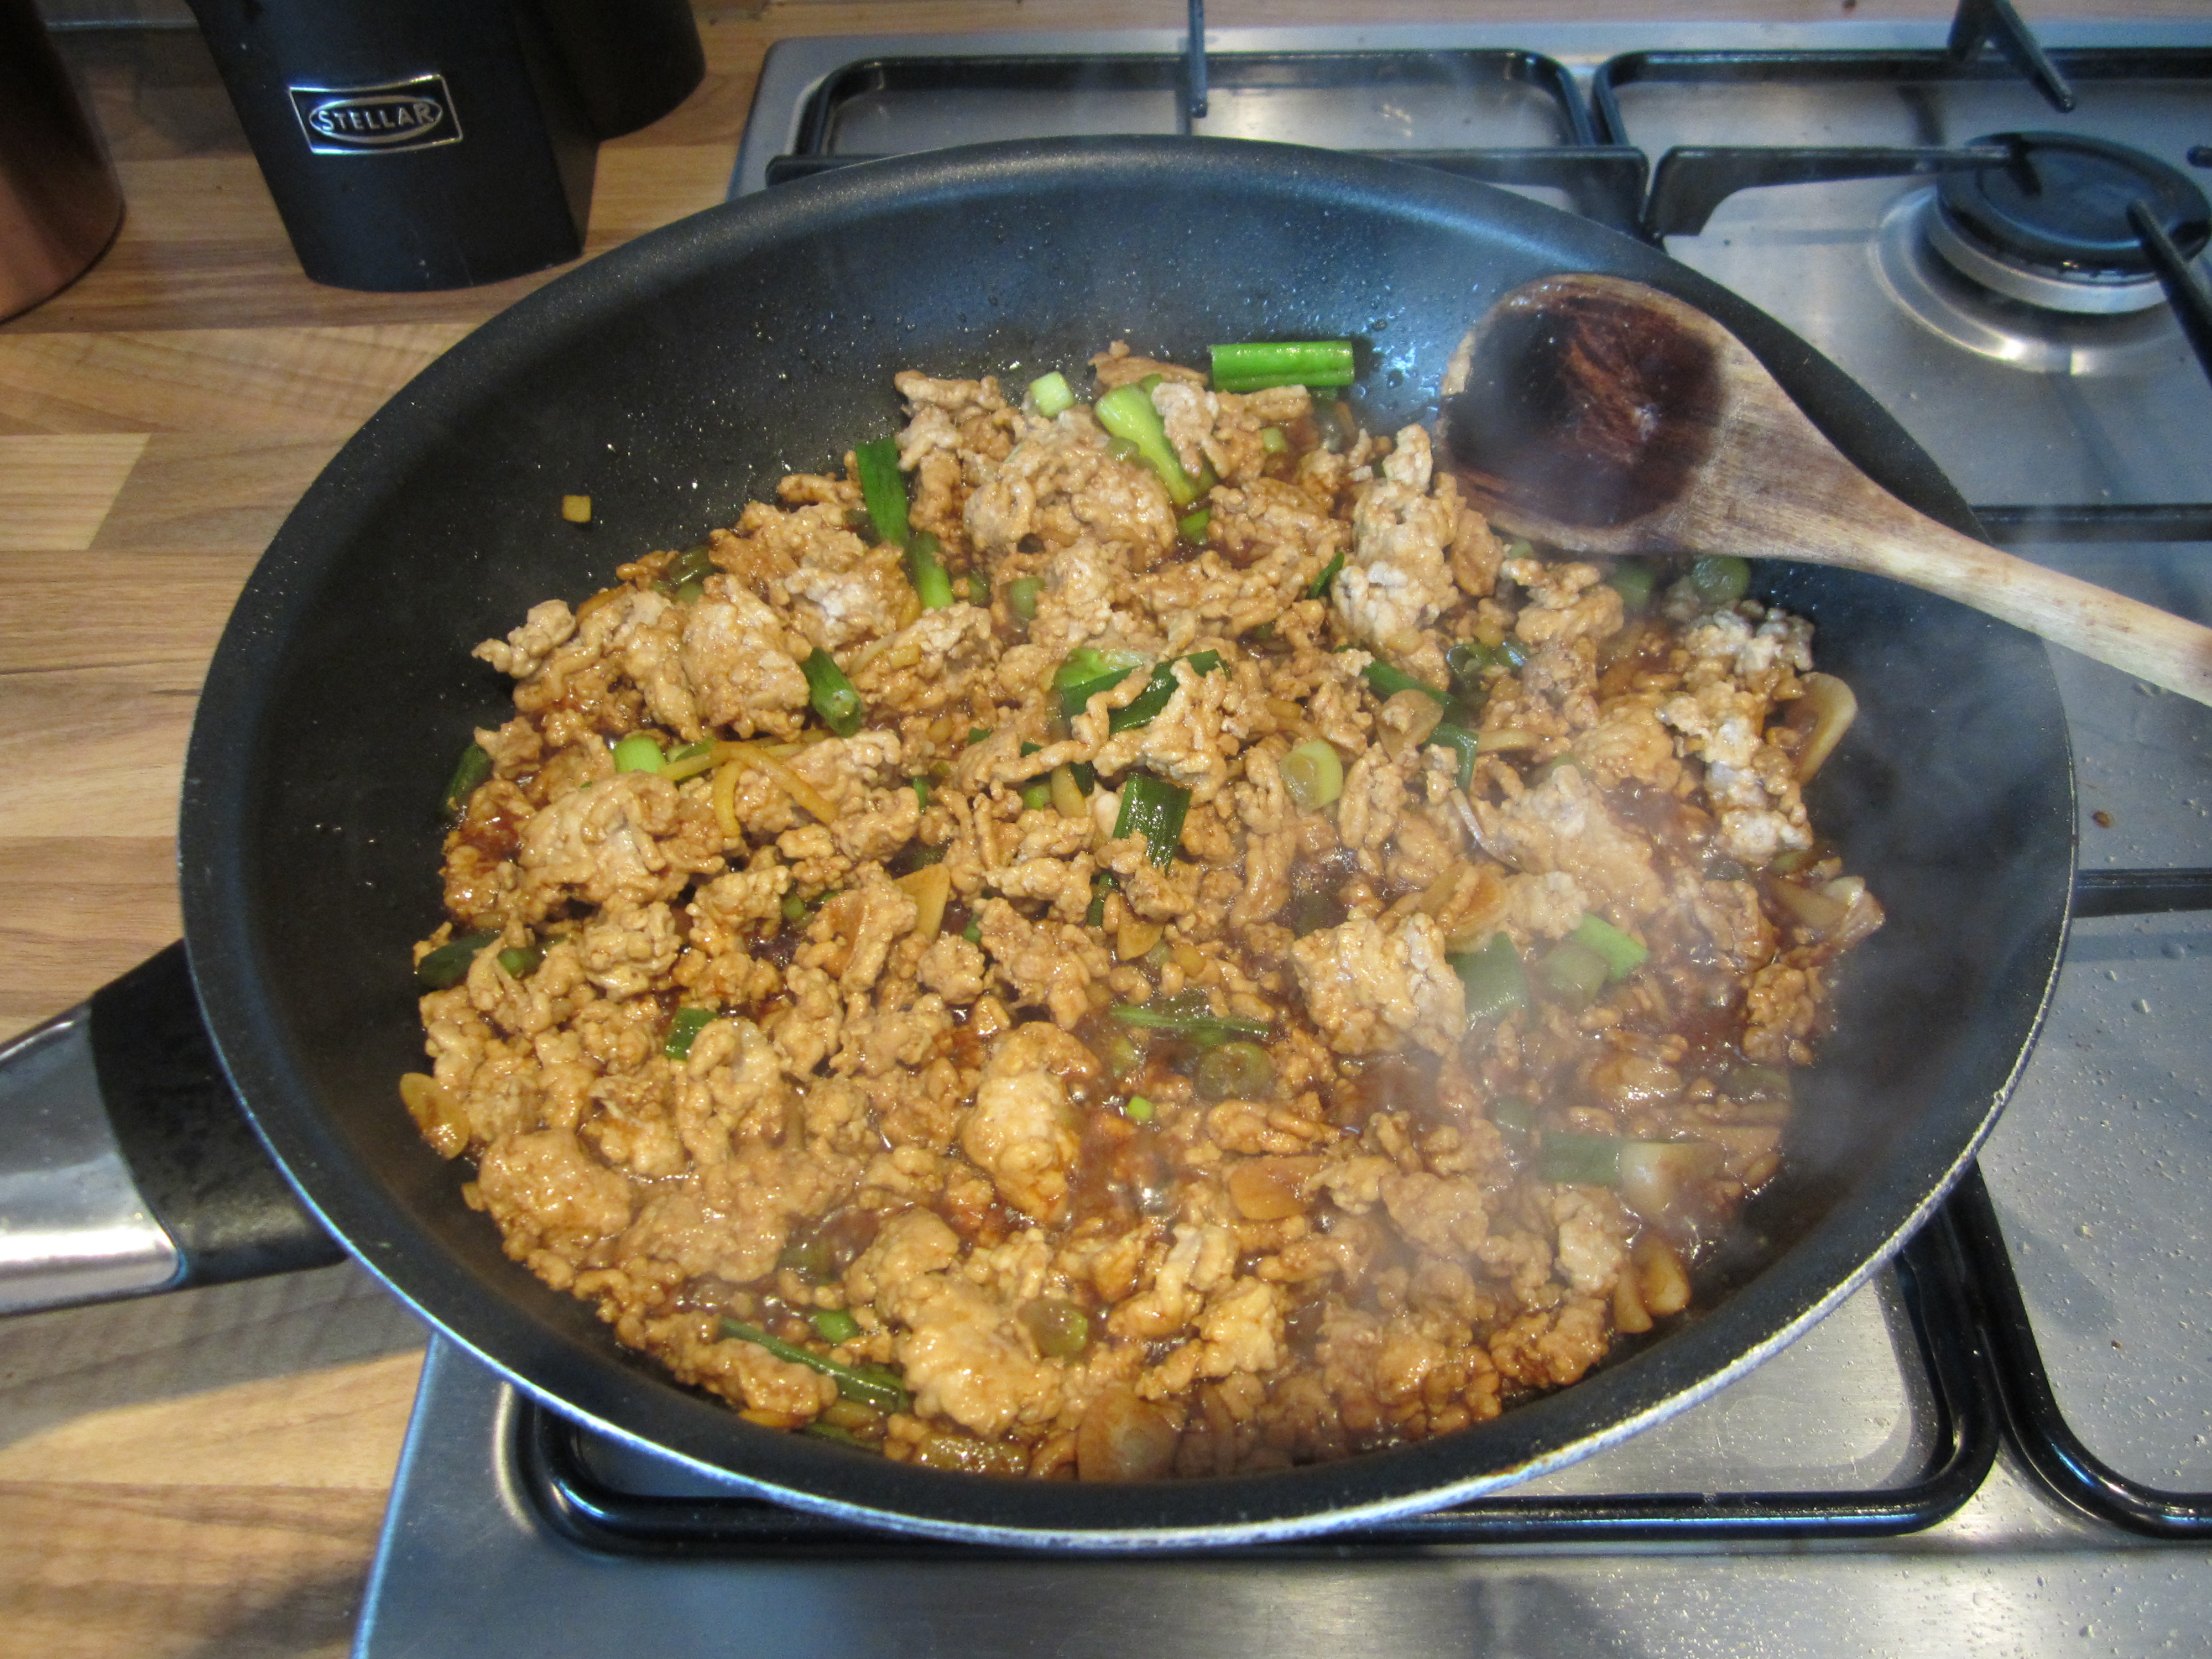
  6. Whilst cooking the chicken, add 8 tablespoons of water to 2 tablespoons of cornflour and mix. Add in 6 tablespoons of light soy sauce, 2 tablespoons of dark soy sauce, 2 tablespoons of rice wine vinegar and 3 tablespoons of honey then mix thoroughly into a sauce.IMG_9072
  7. When the chicken is golden, remove onto a double layer of kitchen towel to drain.IMG_9066
  8. Pour away most of the oil, leaving only enough to cover the base of the pan. Return the oil back onto a medium heat, then add the garlic, ginger and fresh chilli and fry for ~2 minutes until slightly golden.IMG_9075
  9. Add the spring onions and dry chillies and fry for 1 more minute.IMG_9077
  10. Pour the sauce to the pan and bring to boil then allow to simmer for a few minutes until it tightens.IMG_9085
  11. Finally add the cashew nuts and the chicken to the pan, then stir to ensure they are fully coated. Allow to warm through for a further minute and serve with a garnish of spring onion (optional).IMG_9087IMG_9090
  12. Bam it’s done! Enjoy!
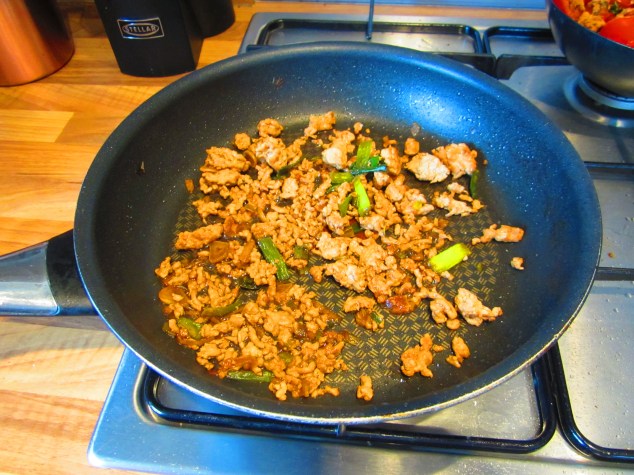
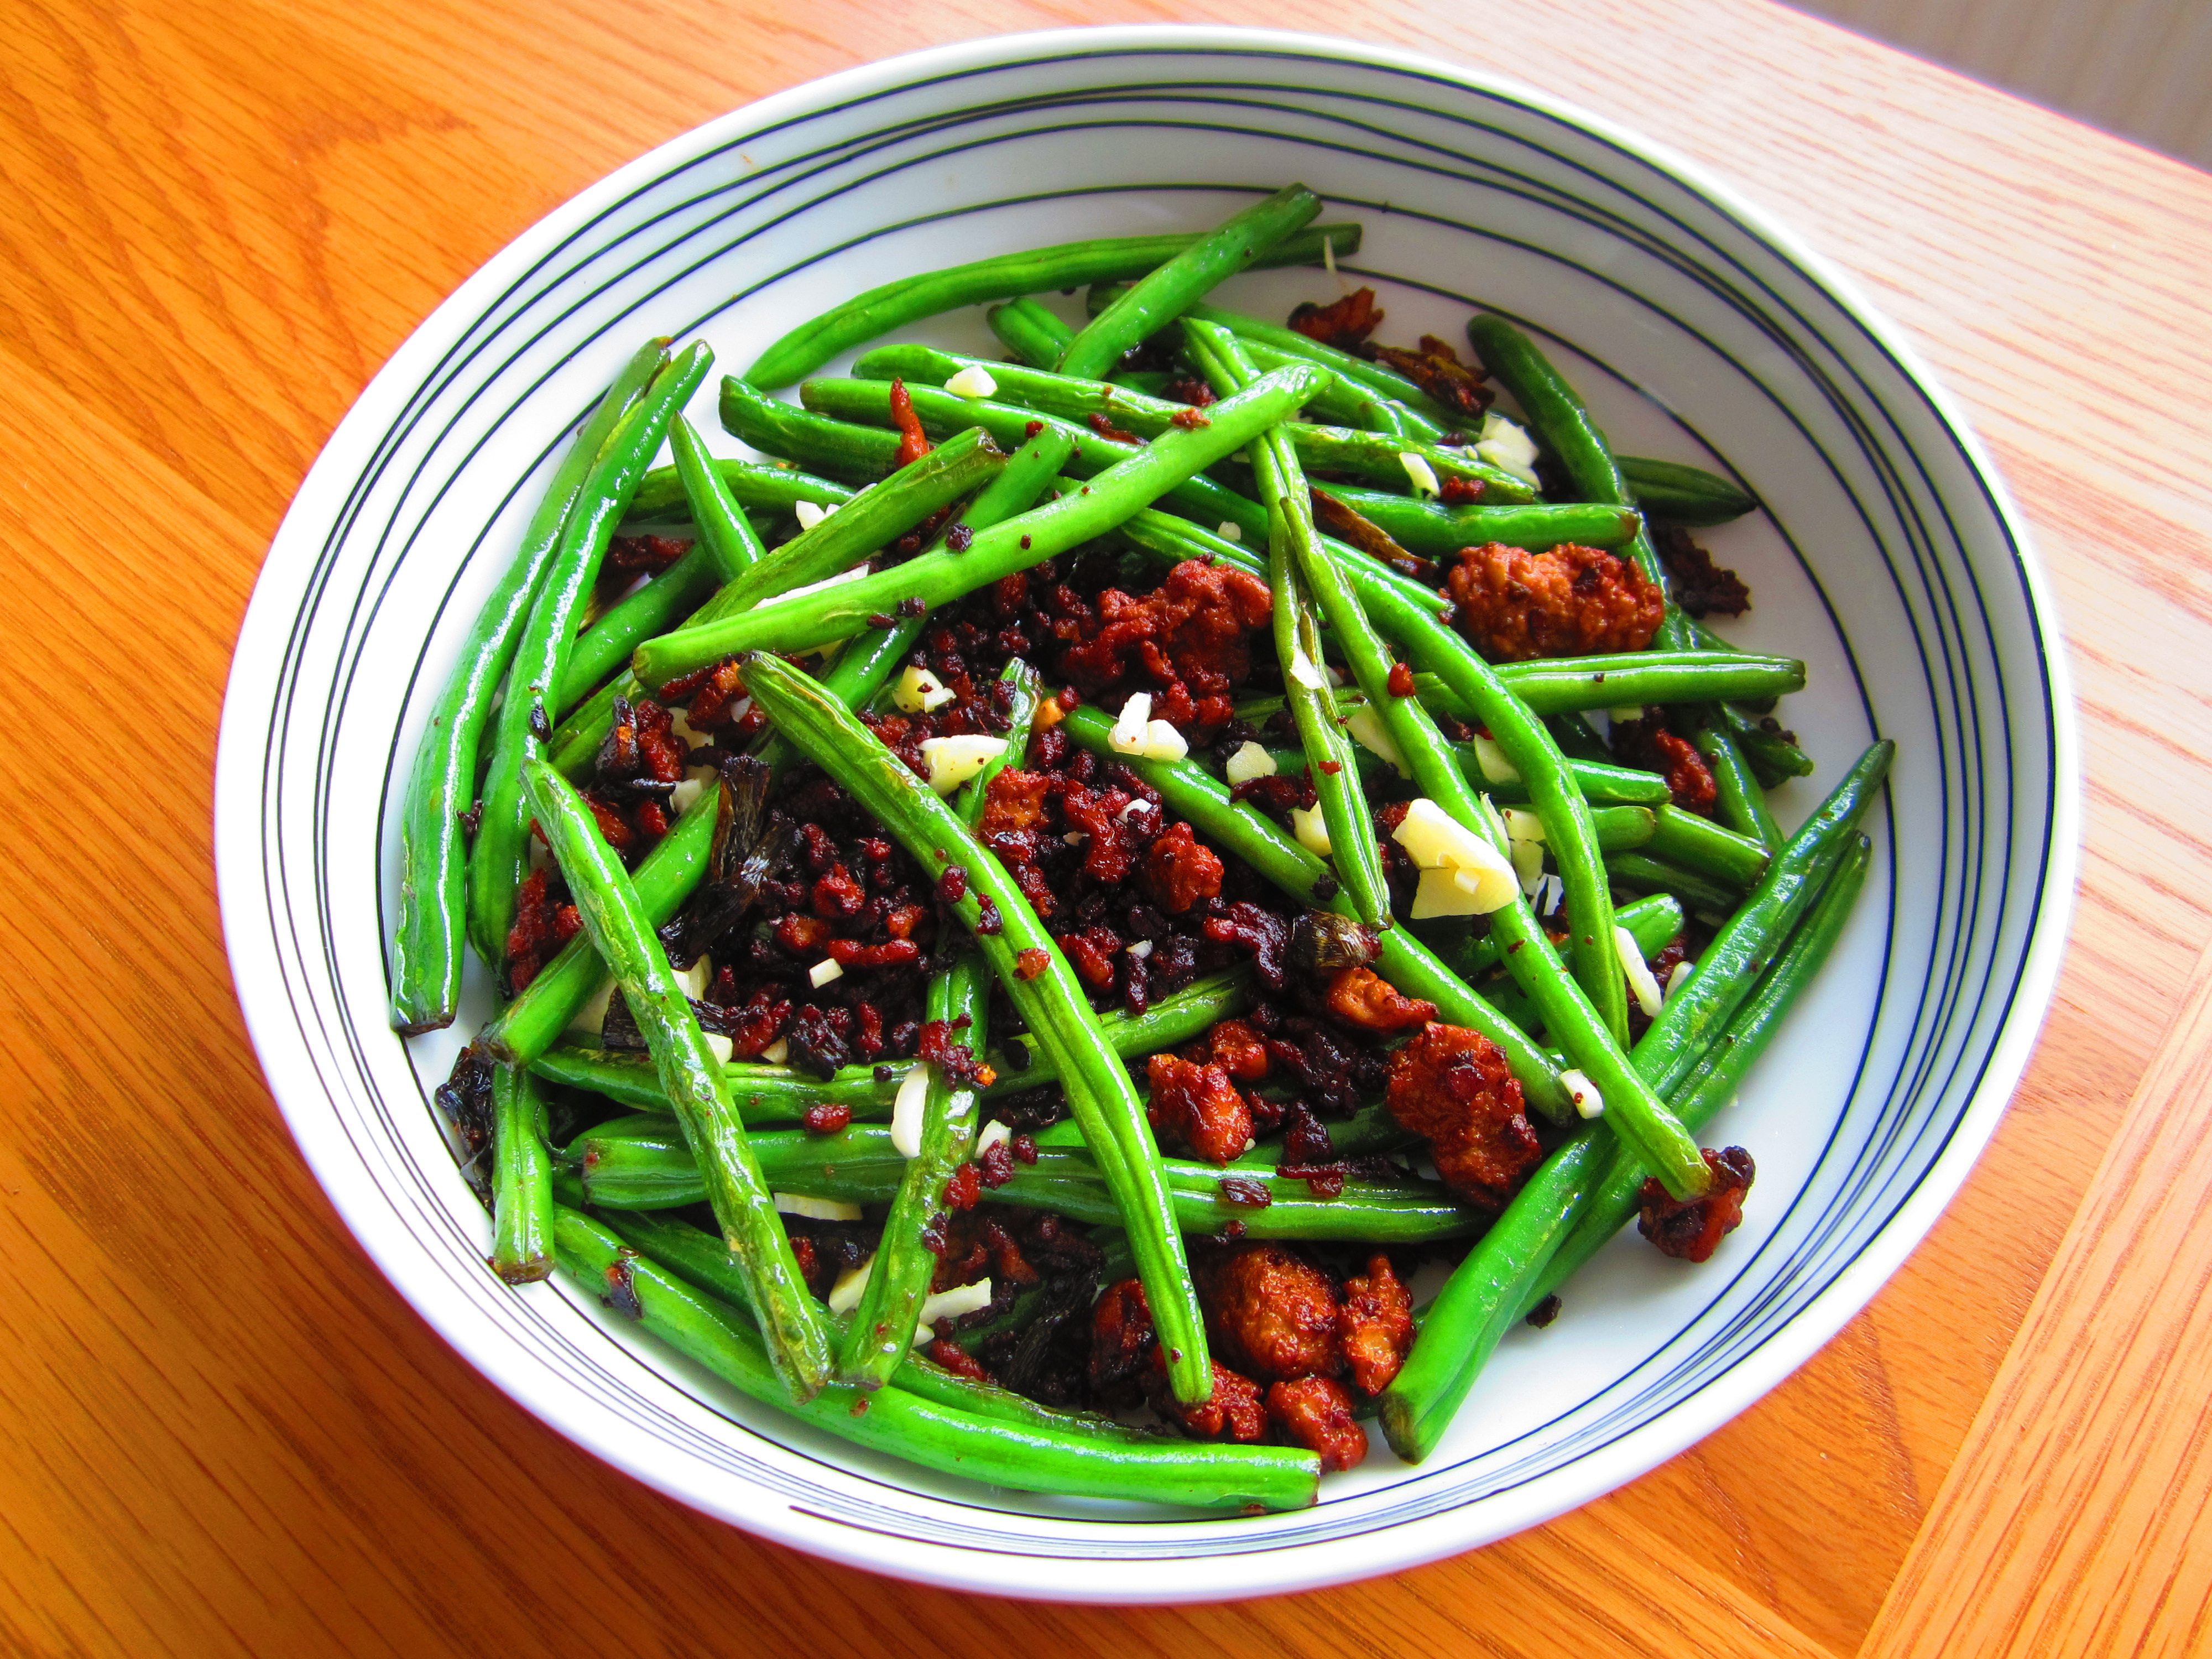
Hello world!

So this is my first blog (I know, I’m very much with the times) and I’ve decided to keep the somewhat appropriate title from the coding world as it brings back a lot of memories of my first introduction to computer programming thanks to the legendary Glen Cowan.

Anyhow, that’s not what this blog shall be about. This blog is all about food, as the title states we all have to eat, so we might as well eat well. To quote one of my favourite directors and self confessed foodie, Robert Rodriguez, ‘to not know how to cook is like not knowing how to f**k ‘… right on that joyful note, keep reading.