 Chinese new year fast approaches, hailing in the year of the Monkey. This was my favourite time of the year, school is out for the winter, there’s lots of snow and fireworks to play around with, people I meet gives me money if I say happy new year and best of all I get to eat lot and lots of dumplings. It wouldn’t be Chinese new year without dumplings, at least not when I was growing up in China.
It just so happens to be my grandad’s favourite too, so we (by which I mean he) makes it all year round. But there’s something special about this time of year. I guess it’s a combination of everyone being home together, each taking on the unspoken but very well define roles in the conveyer belt like process with efficiently produces hundreds of identical pockets of steaming deliciousness. Set that against the freezing winter outside and it’s perfect, there’s is simply nothing in the world better. Can you tell I’m a real serious fan?
Just writing about it brings back nostalgia, and whilst sadly I have to spend this new year away from family in China, at least I can still have dumplings… it just takes a bit more effort. Of course it will never be as good as my grandad’s, even if I have ‘borrowed’ his recipes.
I should mention there are three variations of dumpling, boiled (水餃 – shuǐ jiǎo), steamed (蒸餃 – zhēng jiǎo) or pan friend (鍋貼 – guō tiē), the making process is essentially the same. Boiled is my favourite, and if there’s any left over (almost never) you can always fry them the next day to change things up a little.
As for the fillings, there come in even more, much more varieties. Actually that’s one of the beauties of dumplings, you can put almost anything as a filling and it works… kind of. Same for the dipping sauce, this various across the country. Here I will describe a couple of my favourite fillings and my personal favourite dipping sauce.
 Ingredients
For the dough:
500 g gluten free plain flour
5 tsp xanthan gum (not necessary for non gluten free flour)
1 tsp salt
250 ml water around 30 C (200 ml for normal plain flour)
For the filling:
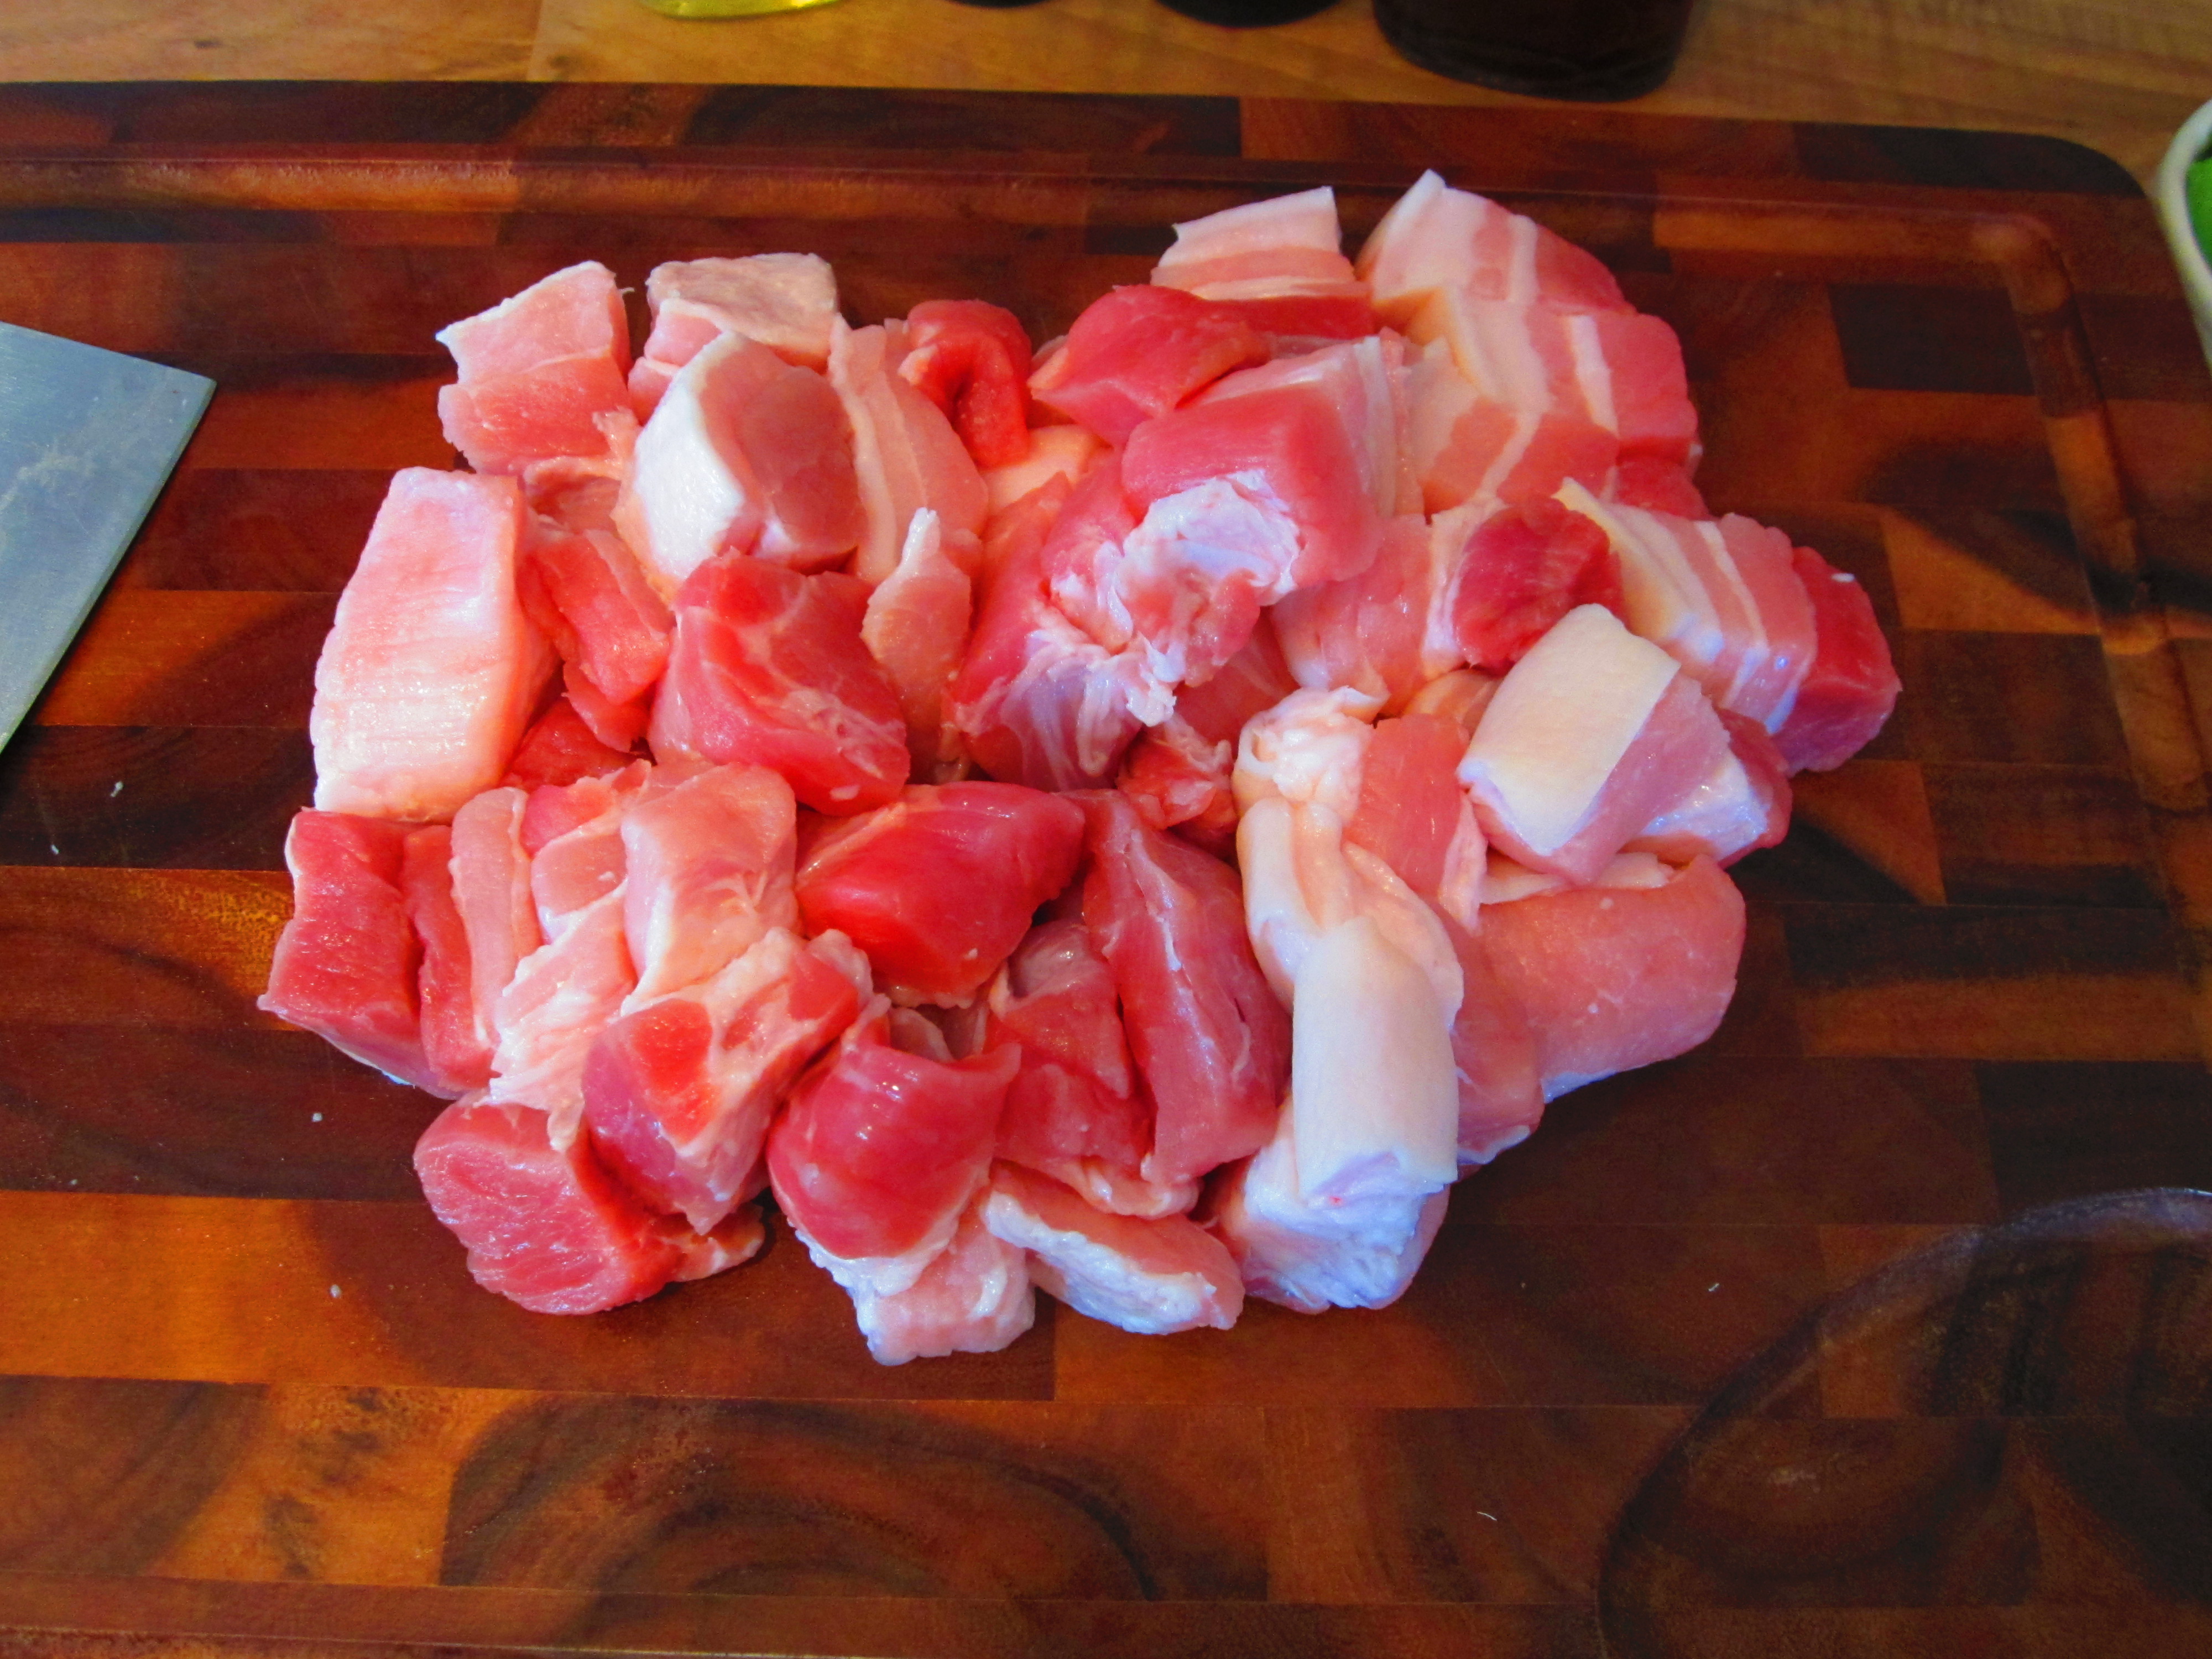
500 g pork mince (ideally containing 10% fat or more)
150 ml Sichuan peppercorn soaked water (place a handful of Sichuan peppercorn in hot water, ideally overnight but at least for 30 minutes)
1 large egg
1 thumb-sized ginger, very finely chopped
1 tsp white sugar
1 tsp salt
1 tbsp all purpose Kikkoman gf soy sauce (or light soy sauce)
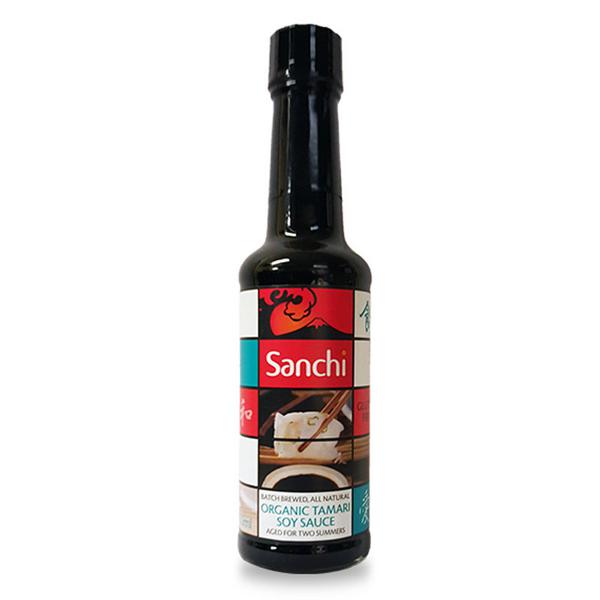
1 tbsp Sanchi gf soy sauce (dark soy sauce)
1 tbsp groundnut oil/vegetable oil (only if the mince contain less than 10% fat)
2 tbsp rice wine
1 tbsp sesame oil
1 tsp Chinese five spice
Options
From the basic meat filling you can create a variety of different fillings. Two of my personal favourites are;
Mince and Chives
Equal part mince and chive very finely chopped, for best result you want to buy the Chinese chives leafs from your local Chinese supermarket.
Mince, prawns and spring onion
1 part mince
1 part prawns finely chopped
1 part spring onions finely chopped
For the sauce:
3 parts balsamic vinegar
3 parts rice wine vinegar
1 part all purpose Kikkoman gf soy sauce (or light soy sauce)
1 part water
1 tbsp sesame oil
2 crushed garlic
1 chilli finely slide (optional for extra kick)
For non coeliacs:
6 part Chinese black vinegar
1 part light soy sauce
1 tbsp sesame oil
2 crushed garlic
Utensils
1 chopping board
1 large pot
2 large bowl
1 rolling pin
Methods
- Add the xanthan gun, plain flour and salt and slowly add the water whilst kneading. Take care not to add too much water.

- The dough should be done after about 10 minutes of kneading, the resultant dough should not stick at all to the touch, light and springy.
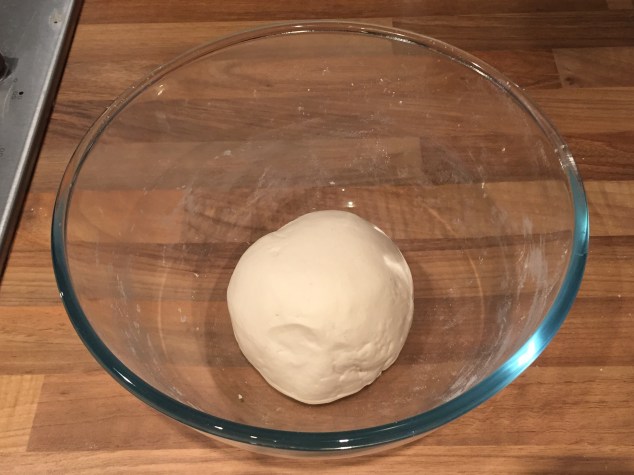
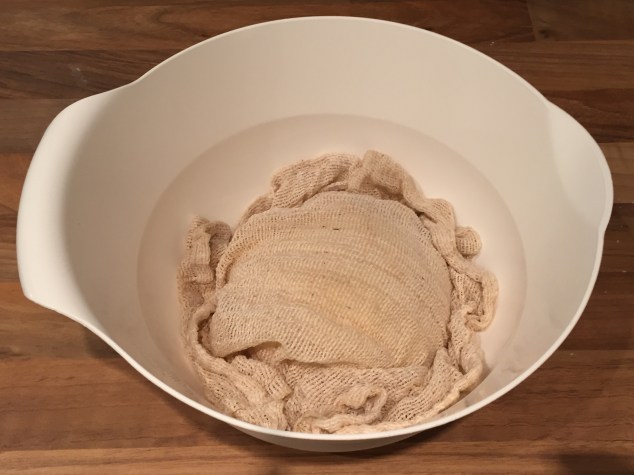
- Cover with a lightly damped clothe and leave for 30 minutes.
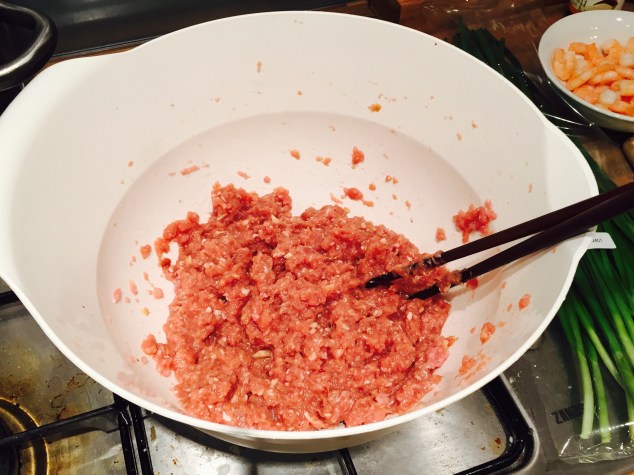
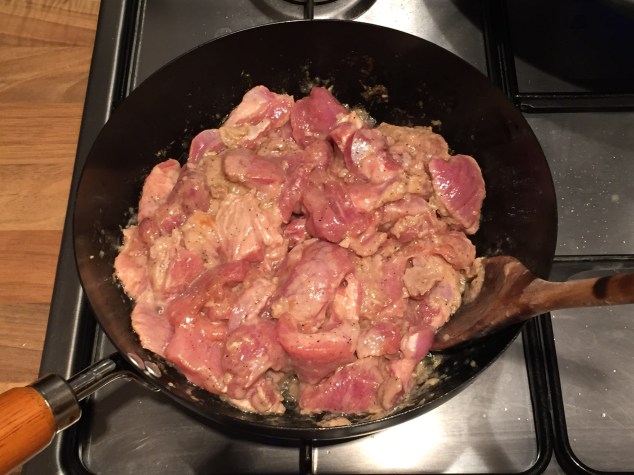
- In the meantime make the filling by adding the egg to the mince.

- Then add Sichuan peppercorn soaked water, ginger, Chinese five spice, rice wine, sesame oil, light and dark soy sauce. Mix in one direction until the mixture is well blended, then add the sugar and salt to taste. Mix again until everything is uniformly blended, you basic mince is done.
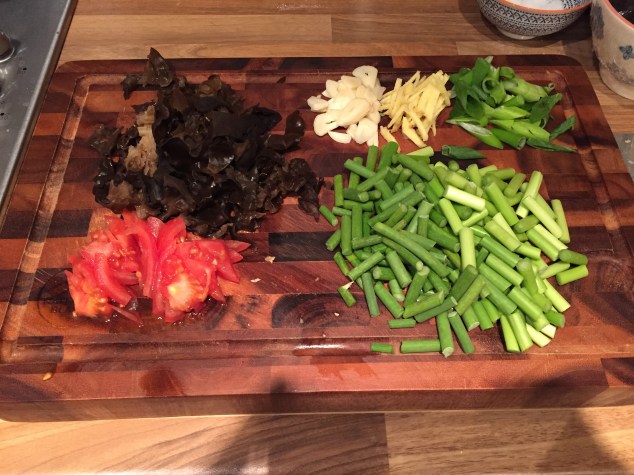
- Chop the desired vegetable as finely as possible.
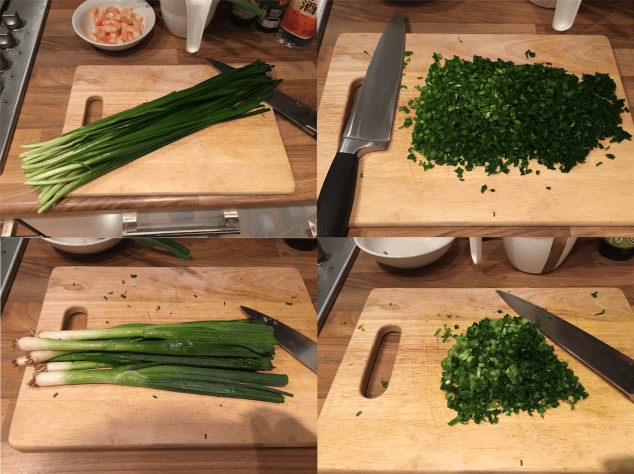
- Add the vegetable to the mince and the finely chopped prawn.

- Leave the filling aside, take the dough and knead it for another minute.

- Now roll the dough evenly until it’s about the width of a 2 pound coin or about 3 cm.

- Cut the dough into 1.5 cm slices.
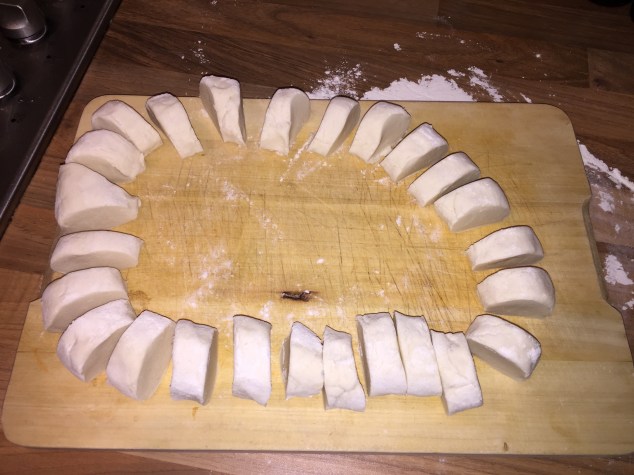
- Mix some flour into the dough chunks.
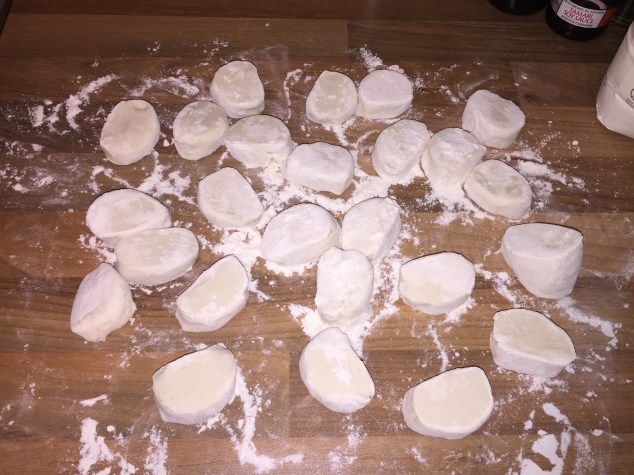
- Use the palm of your hand to squash the dough flat.
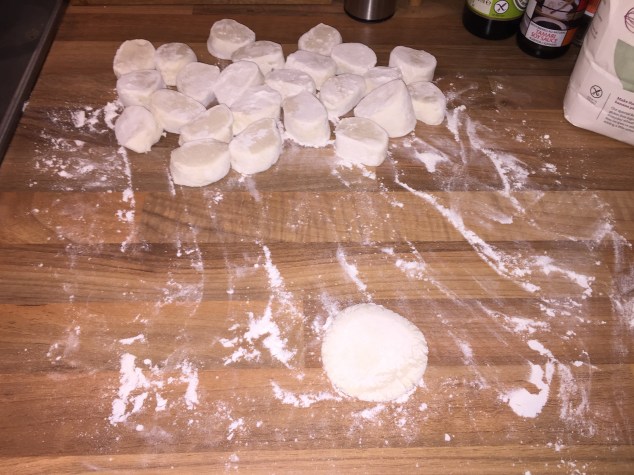
- Use a rolling pin to further flatten the dough, try to roll out the edges more than the centre. This is important for later when actually making the dumpling.

- Take the filling and place at the centre of the dumpling skin.
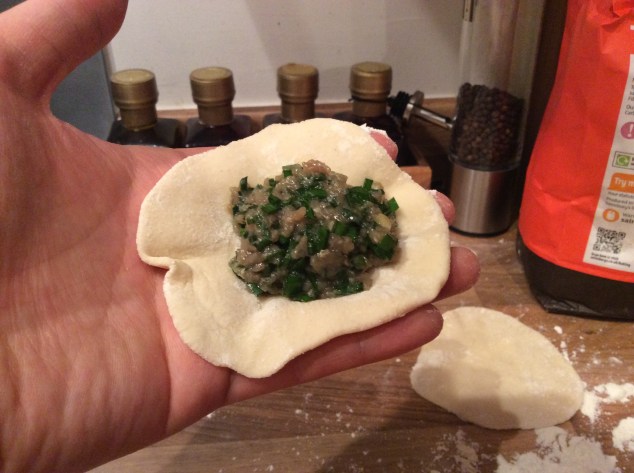
- Carefully seal the filling inside, take care not to let any filling poke out. This will disrupt the seal and may cause the dumpling to burst when boiling.


- Once sealed around the edges, place the dumpling in both hand, with the edges held by the index and thumbing squeeze in palm. This further seals the dumpling. If you are experience then you can really skip the last step and do this straight away.


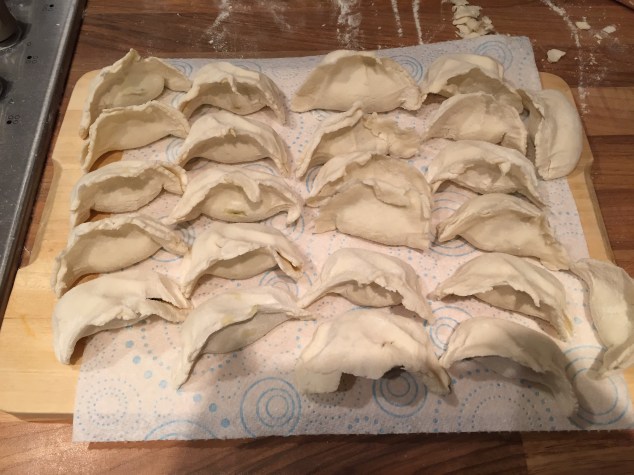
- Leave the ready dumpling on a surface which will not stick (these look kind of sad but it was hard to get the right consistency with gluten free flour, it’s not as elastic).
- Boil water in a large pot on high heat.

- When the water is boiling, add the dumplings which will sink to the bottom. After a minute carefully move them off the bottom so that they don’t stick. Eventually the dumplings will float to the surface.

- In the meantime make the dipping sauce. Crush the garlic and add the vinegar, soy sauce and sesame oil together. It ready!

- When the water is boiling again, add 100 ml of cold water. Repeat this 3 times and the dumplings are done!

- Taken them out carefully with a straining ladle.


- Serve and enjoy!


 I’ve had some good feedback for my dumpling recipe and I’m glad to hear so many people have been inspired to make it for themselves. In particular an office competition for the best dumplings. The result ranged from 60 plus dumplings following the recipe to just 2 whole dumplings (very high standards) including ones the size of cornish pasties. The general feedback is making the skin and filling it seems to be the most difficult part.
 Ingredients

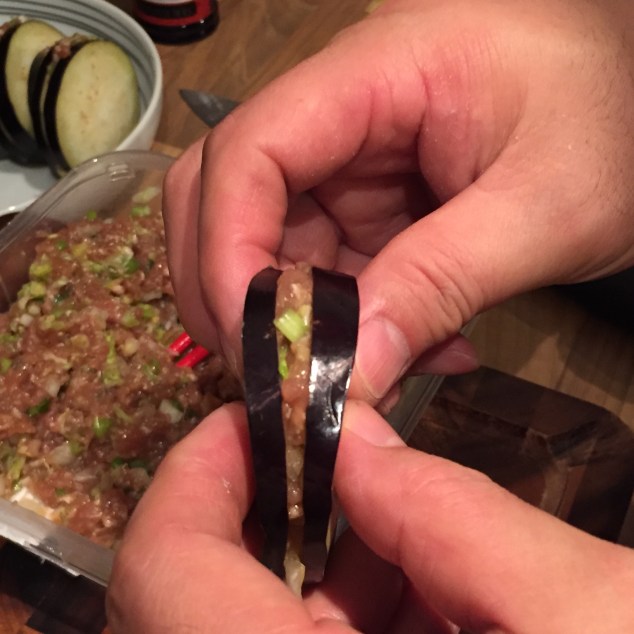


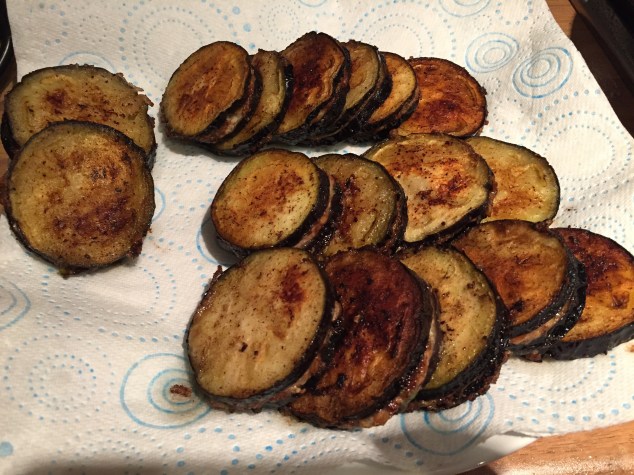


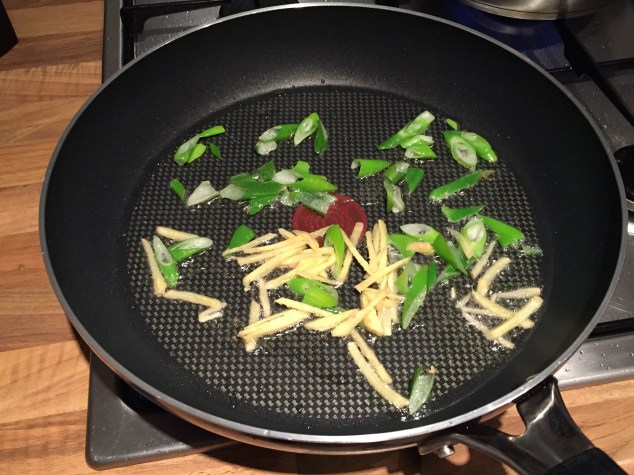
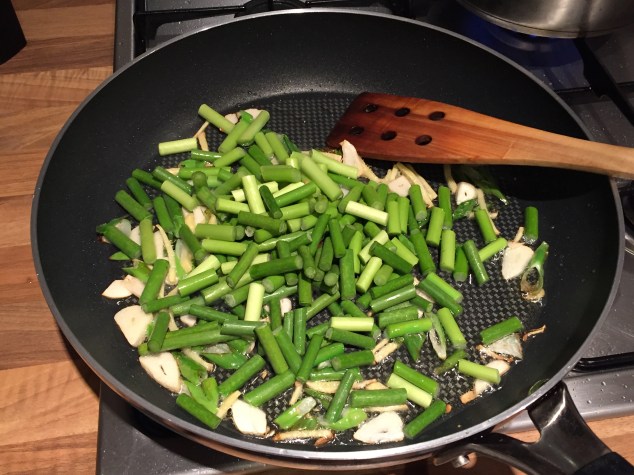
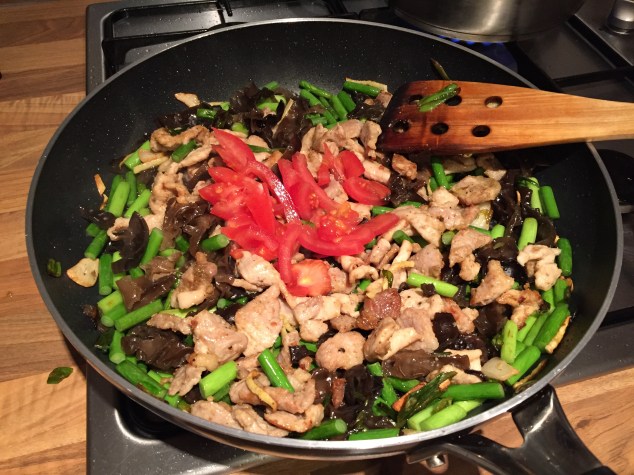
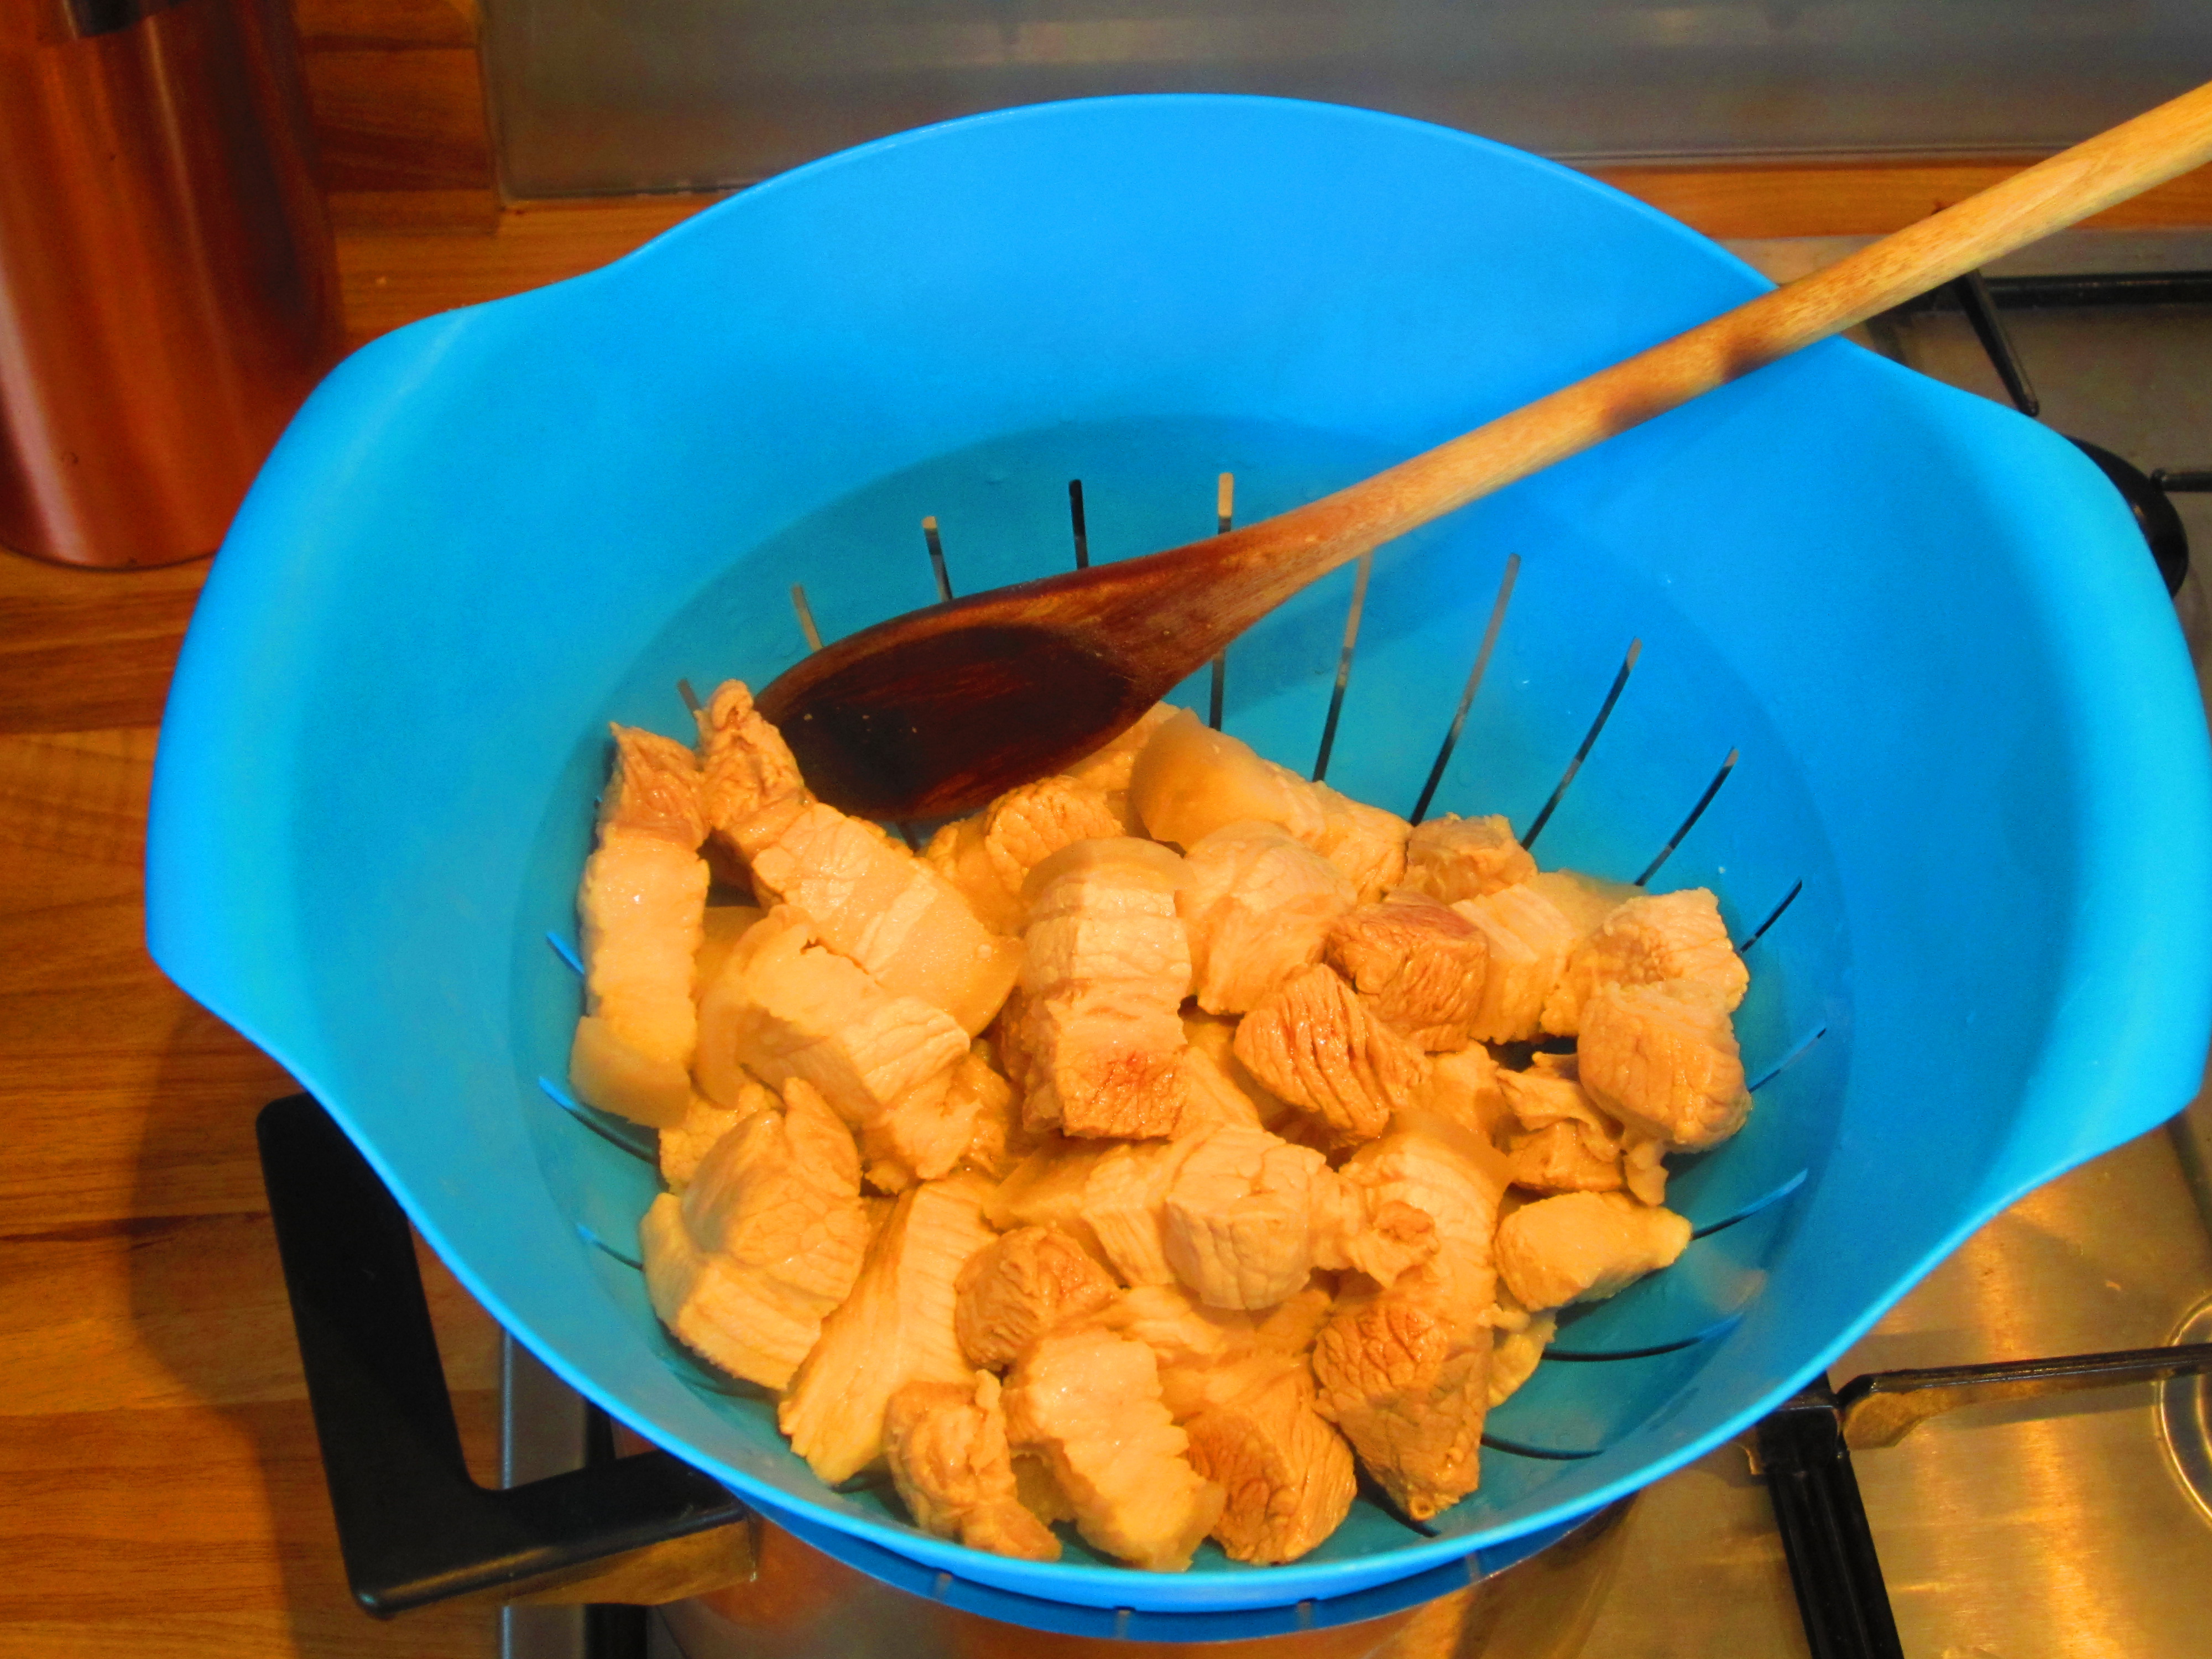
 This is another favourite of my childhood years in China. It originates from the ShanXi region of China and the making of it can vary quite a lot even within the province. This is my take on it and although it doesn’t compare anywhere near some of the best I’ve had, it’s close enough to make me miss them. The key to this dish is plenty of oil and high heat, everything should be done in as little as 5 minutes! In Chinese the name literally means meat passing through oil by oil they mean very hot oil!
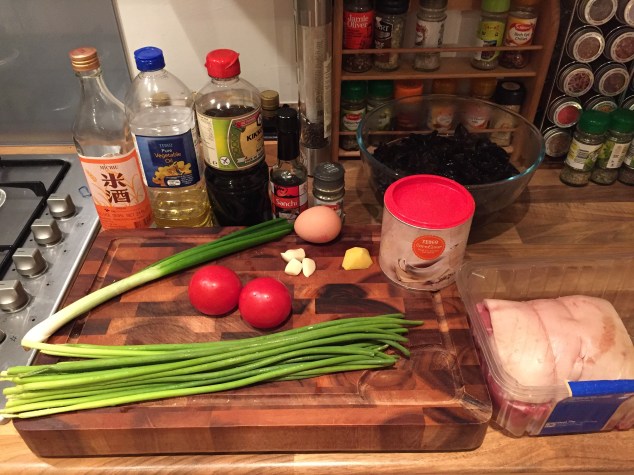


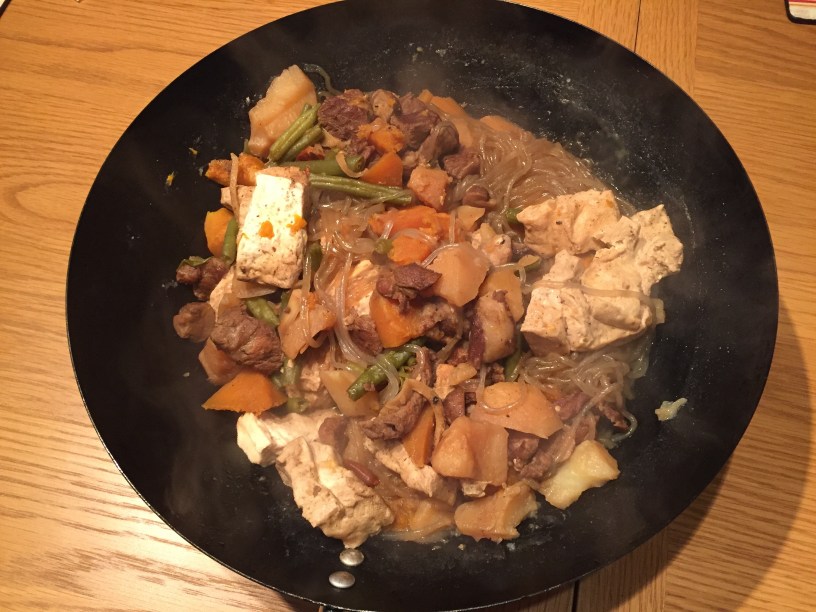
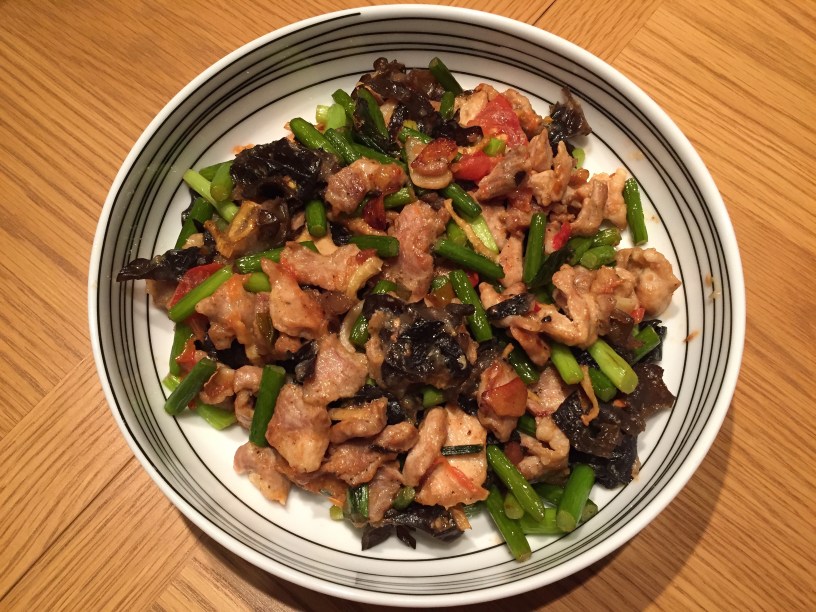
 In a recent discussion with a friend, who I consider a good authority on all things Chinese having studied it for 5 years at University, she mentioned a lack of good comfort good in chinese cooking. While I would argue red roasted pork with rice is true home comfort, I thought I would throw something new into the mix.
 Ingredients (Serves 4)


